Truss Rod Slotting Jig
This is no big deal. A hundred other builders have the same thing.
This jig facilitates cutting or re-cutting a slot for a replacement truss rod. Many vintage Harmony Sovereigns we receive have broken truss rods. We don't bother pulling the old out and replacing with an original Harmony OEM rod although that is not hard at all to do if the neck is off the body. The Stewmac #2551 is superior in every way. We just pull the fb off and install a nice new rod. Besides, many Harmony necks need refinishing anyway. We also take the opportunity to install new fb binding. Of course, if the original rod is working we leave well enough alone.
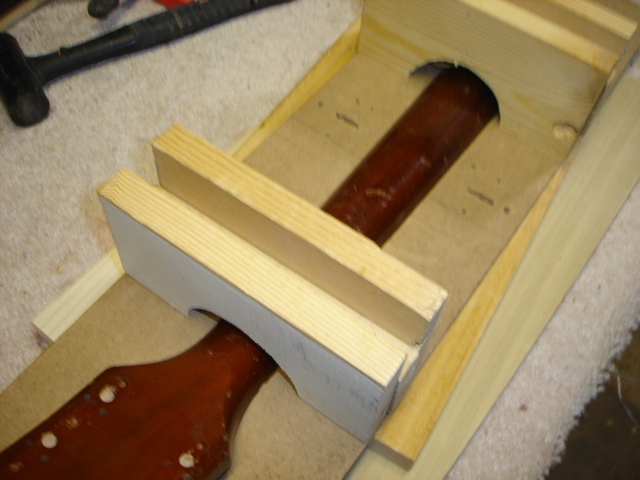
The jig is made of two sets of three maple blocks and a 1/4 inch thick slotted plywood guide. Each block set has two outer blocks which guide and align a center block. The center block in each set has a "V" cut padded with a piece of non-slip matting. The "V" is about 60 degrees. One screw on each end of the two neck clamp blocks pull the "V" block up towards but not touching the slotted guide, thereby trapping the flat surface of the neck against the underside of the slotted guide. The "V" cut out prevents side to side movement.
Use a small plunge router with a Porter Cable type guide to guide the router down the part of the neck to be slotted. By far the best router to use for this is the Dewalt DW611PK with plunge base.
For best results when installing the excellent Stewmac 2551 dual action truss rods in Sovereign necks, you must use the Stewmac 0.225 inch router bit (4599). I have never seen this bit available anywhere else. I sure does a nice job cutting slots for the 2551 truss rod.
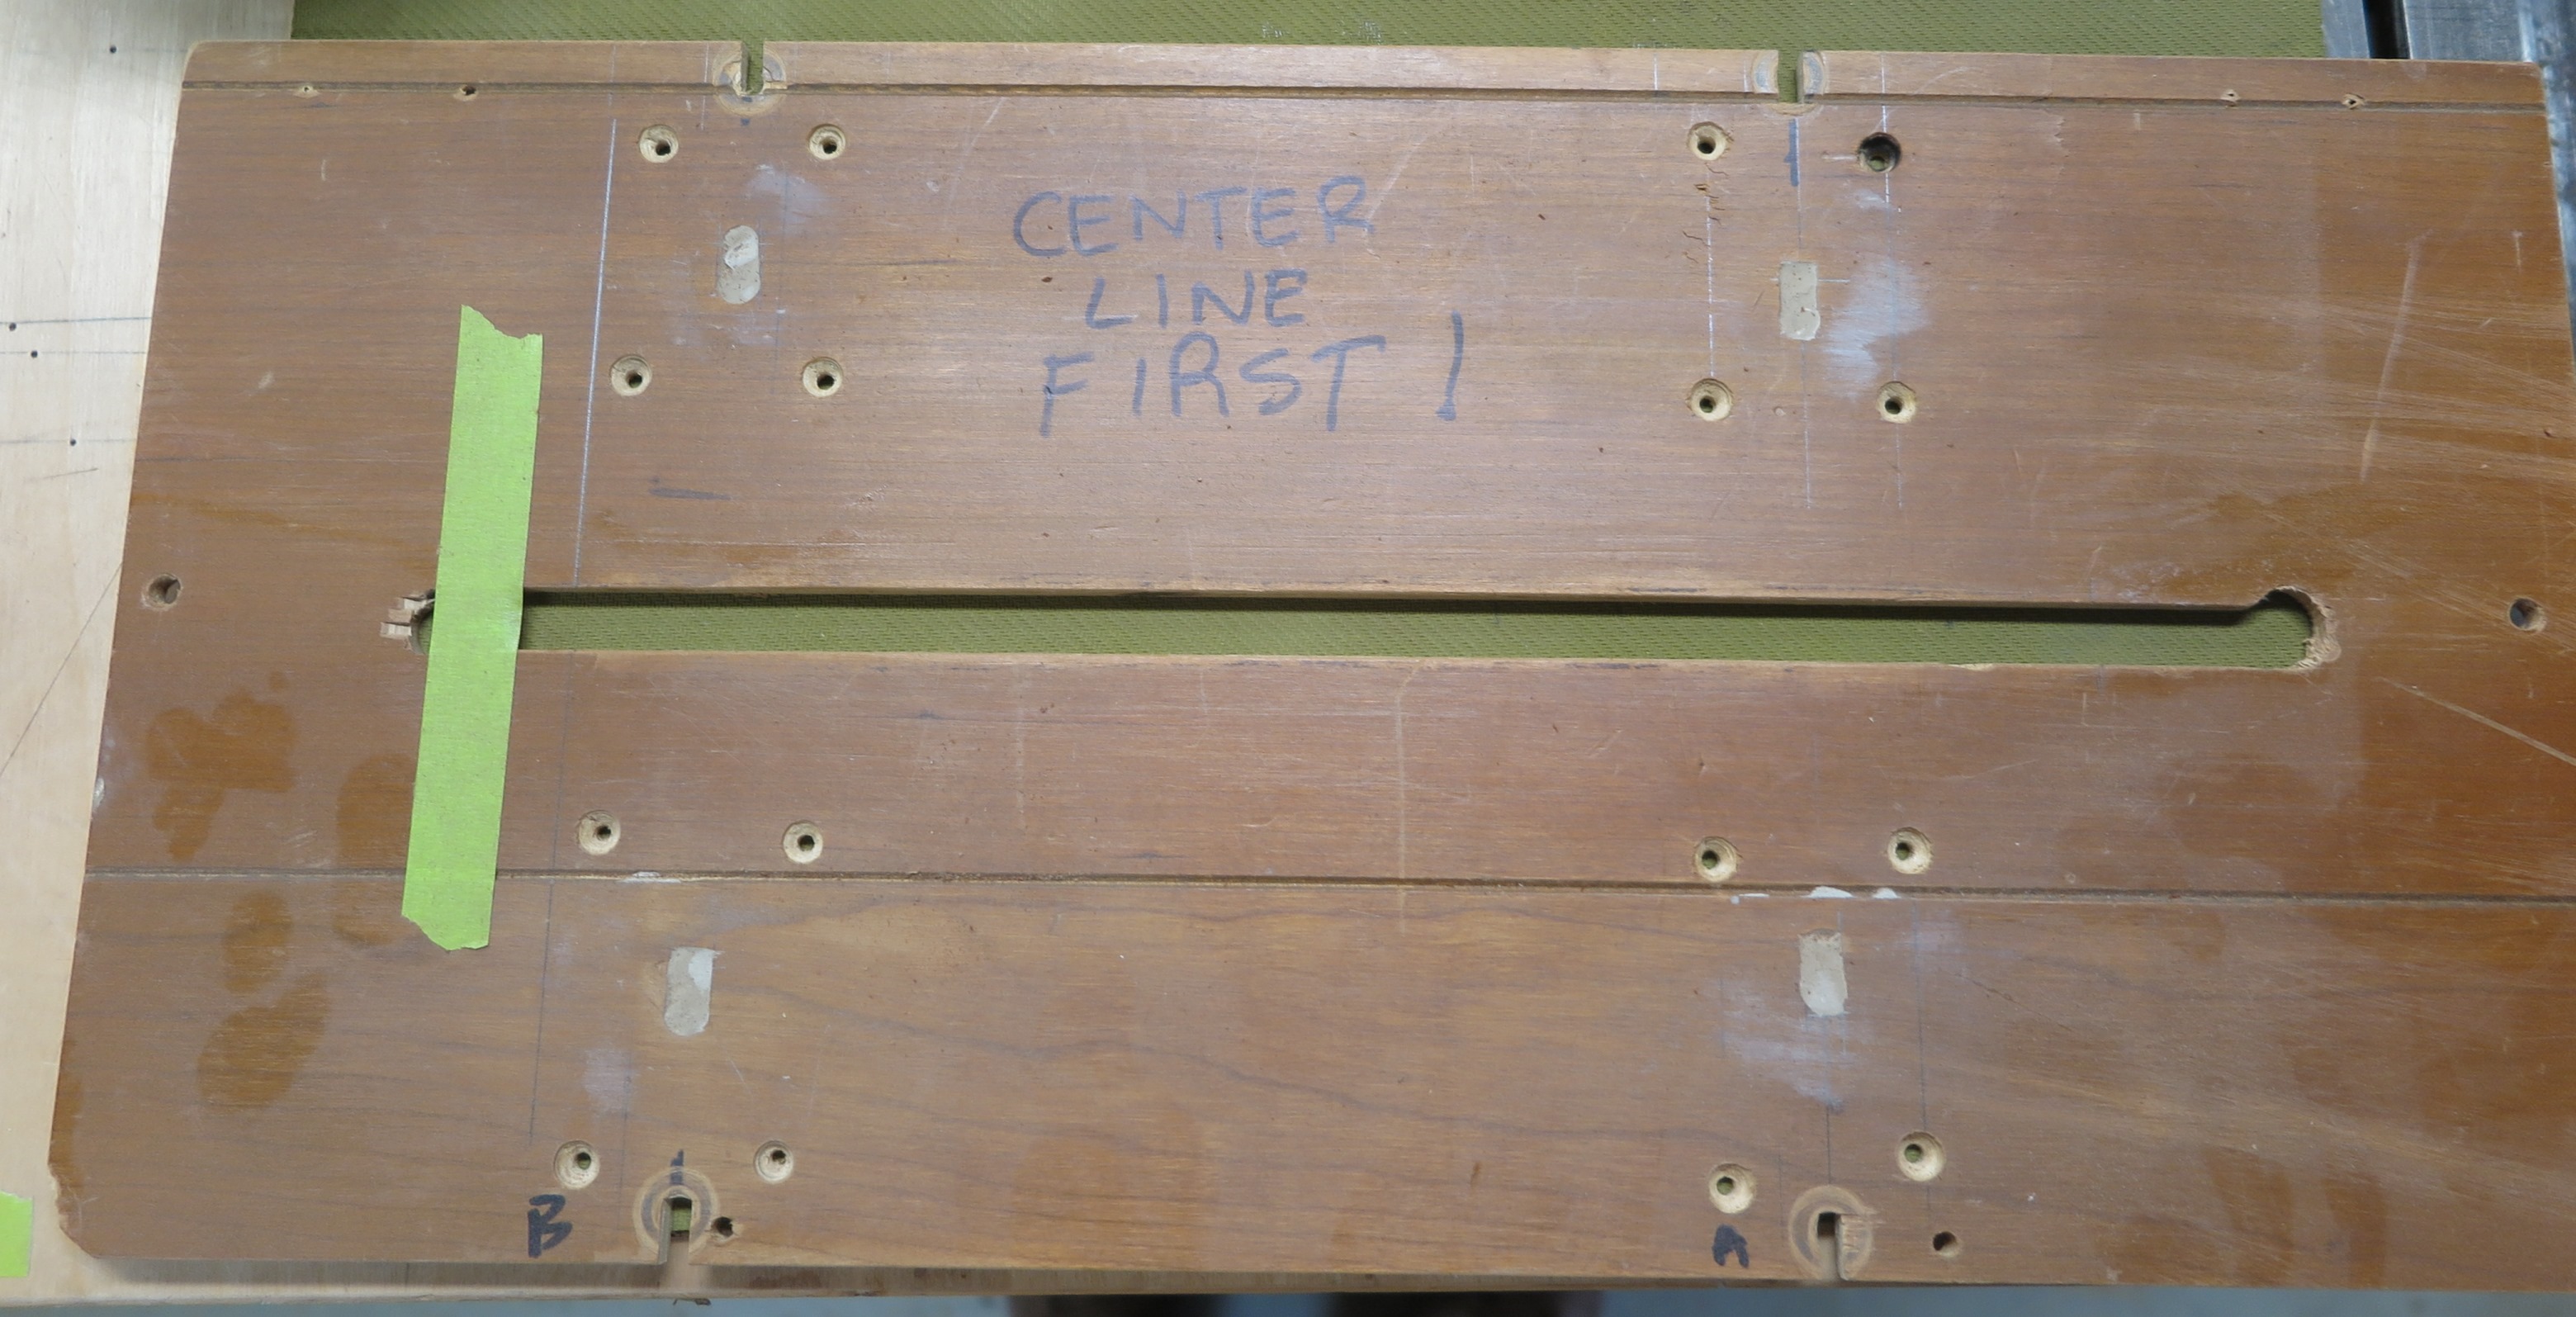
After building the first version of this jig, I soon realized that a much stiffer slotting guide was needed. MDF just flexes way too much. Here in cabinet shop la la land, we are blessed with piles of old cabinet parts and plywood bits. Shown below is the slotted guide plate made of 50 year old paneling from a bank president’s office we helped remodel years ago. This material is a full 1/4 inch thick and all solid cherry veneer. No voids and no luan or other soft filler. Premium stuff for jig making. It really helps to have top quality materials available. Anyway, note the four sets of four counter sunk holes with a slot on the edge between each pair of holes. The counter sunk holes attach the pairs of blocks to the slotted guide. Two 3 inch wood screws go through the slots into the clamp blocks that pull the neck up against the slotted guide plate. The slots allow side to side movement of the neck for centering. Center first, then tighten the screws. The wood screw have washers under the head. You can see where the washers slip around in the slots.
Underside of slotting jig with neck clamped in place.
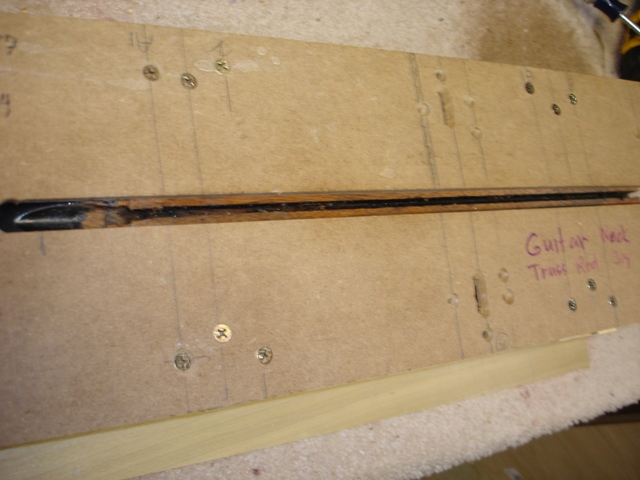
Slotting jig below is now obsolete. Shown here only to show in relation to top of neck.
©2018 D.R. Hanna