Harmony (And Many Others) Bridge Removal
This article shows an aluminum bridge heat distributor, a heating pad and an LMI controller thermostat.
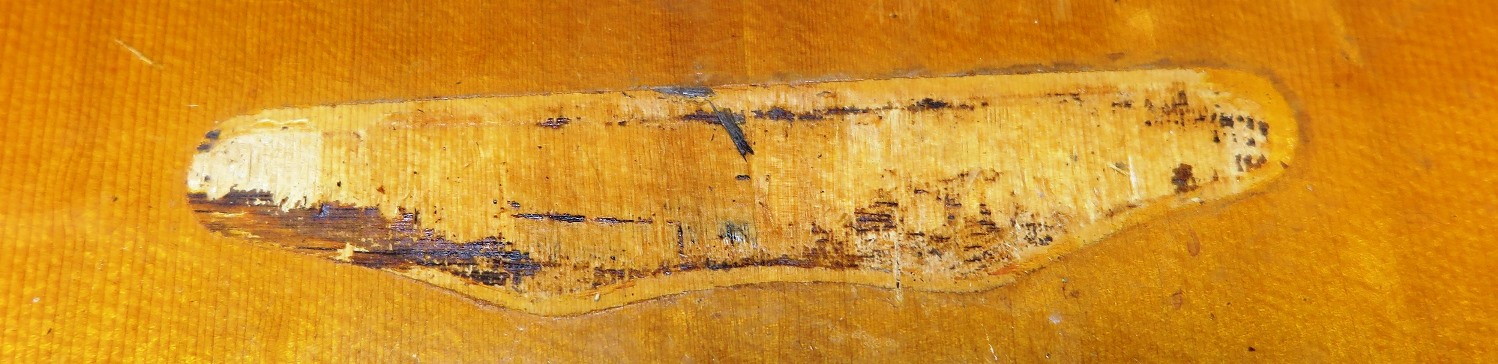
Original condition Harmony bridges are tough to remove because they are oddly shaped. It is just about impossible to heat the entire surface of the bridge due to high spots and low spots. I know some folks do remove unmodified Harmony string through bridges but I think this increases the chance of top damage. Anyway, our method is very fast and efficient and with zero top damage.
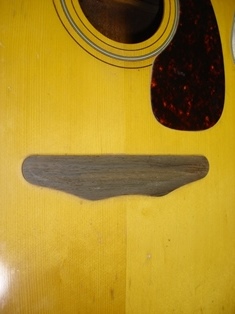
So we use a router to remove all but a 3/32 to 1/8 inch layer of bridge leaving a flat surface. Now the heat pad can evenly heat the entire bridge.
(1)The image below shows the bridge remaining after the flattening operation. Please see my article on the slotting jig which is also used for flattening as described herein.
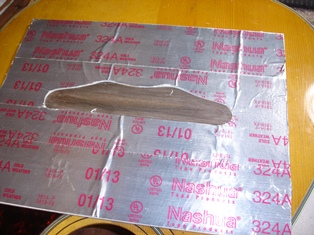
(2)Next image shows a protective cover. This keeps the heat away from the top. It works very well as long as the heat is regulated to 230 degrees f. or less. It is made from acid free picture board and aluminum HVAC tape.
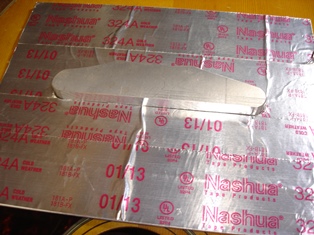
(3)The next image shows a custom made 1/2 inch thick aluminum block shaped to the same profile as the Harmony H1260 bridge. This spreads the heat around the entire thin bridge remainder.
(4)Sometimes I add a plumbers heat resistant blanket around the aluminum heater blanket. However, when using a temperature regulator, this is not usually needed.

(5)Next image shows the final heater, regulator, and clamping system set up. You can see the temperature controller in the back ground. In the distance you can see the temperature controller creeping up towards 230 degrees. The little heat blanket is clamped under a maple block covered with HVAC tape.
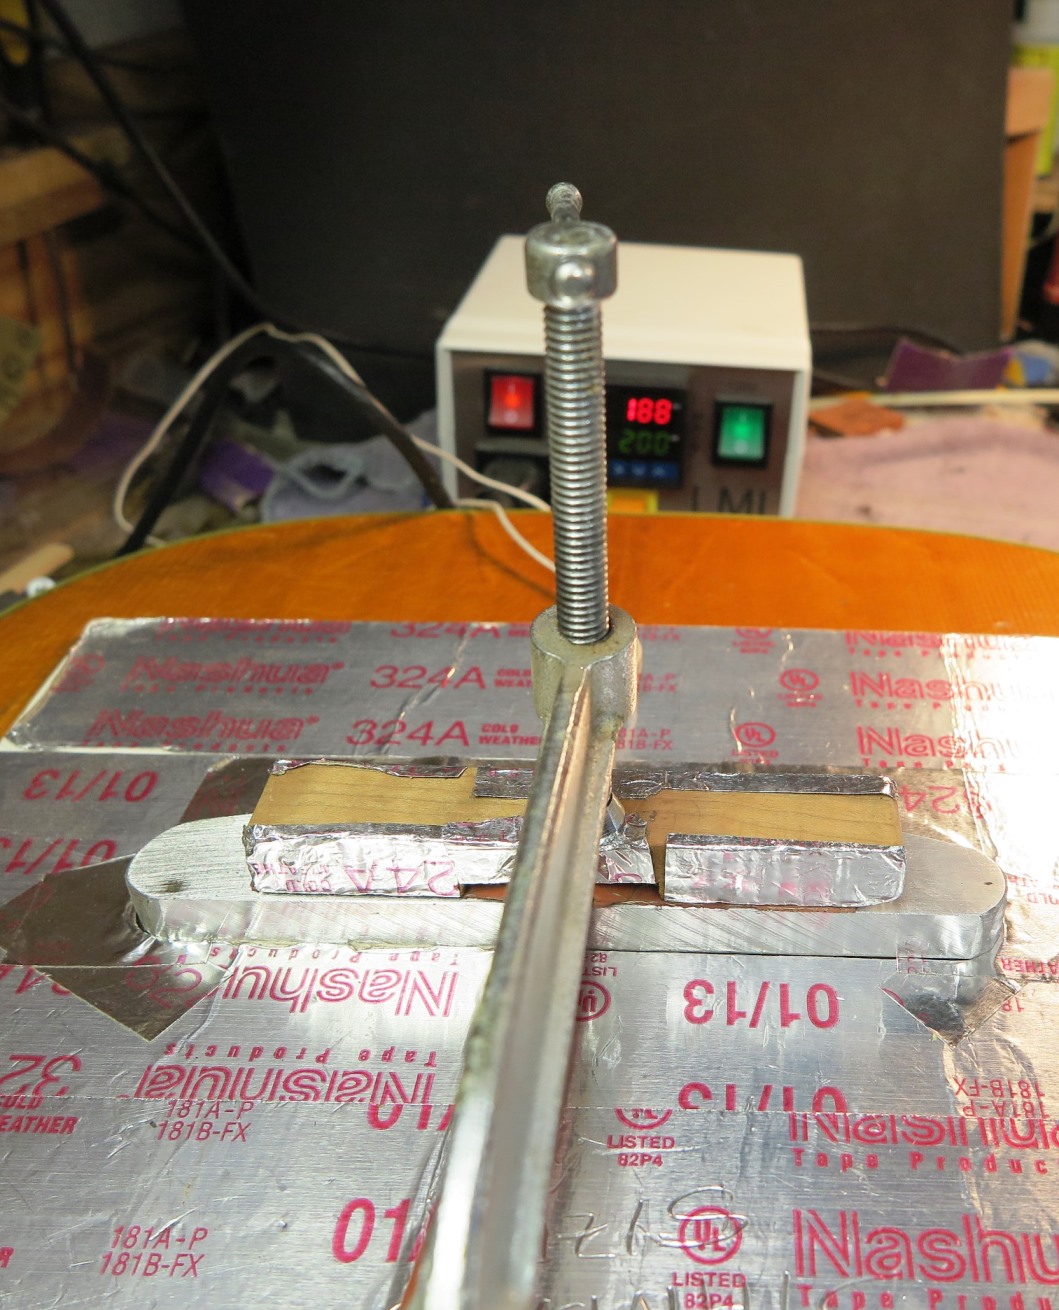
Generally, it takes around 30-45 minutes for the heat pad to reach 230 degrees F. and to heat the large Harmony bridge.
The final step is removing the bridge. However, before we go any further a word of caution: Never force or pound any tool parallel to the top wood grain. All lifting and spatula work is perpendicular or at no more than a 45 degree angle to the grain.
Use the tool shown below to start lifting the bridge all around. Only push this under the bridge approximately 1/4 inch or less. You are only "starting" the edges and maybe loosening a little glue. This extra long cake frosting tool is perfect for loosening bridges because it is very stiff and straight. The straight blade makes this a very powerful thin chisel. All of the power of a hammer blow is transmitted to the tip. This is not true with an offset bladed tool. Another great characteristic is the long blade. This allows the blade to sit completely flat to the top from the guitar sides. The handle extends completely free of the top to the sides so you won’t accidentally gouge the top. Before using, I sharpened one side of the edge leaving a flat side and a beveled side.
(6)Stewmac removal tool (4466) and frosting spatula.
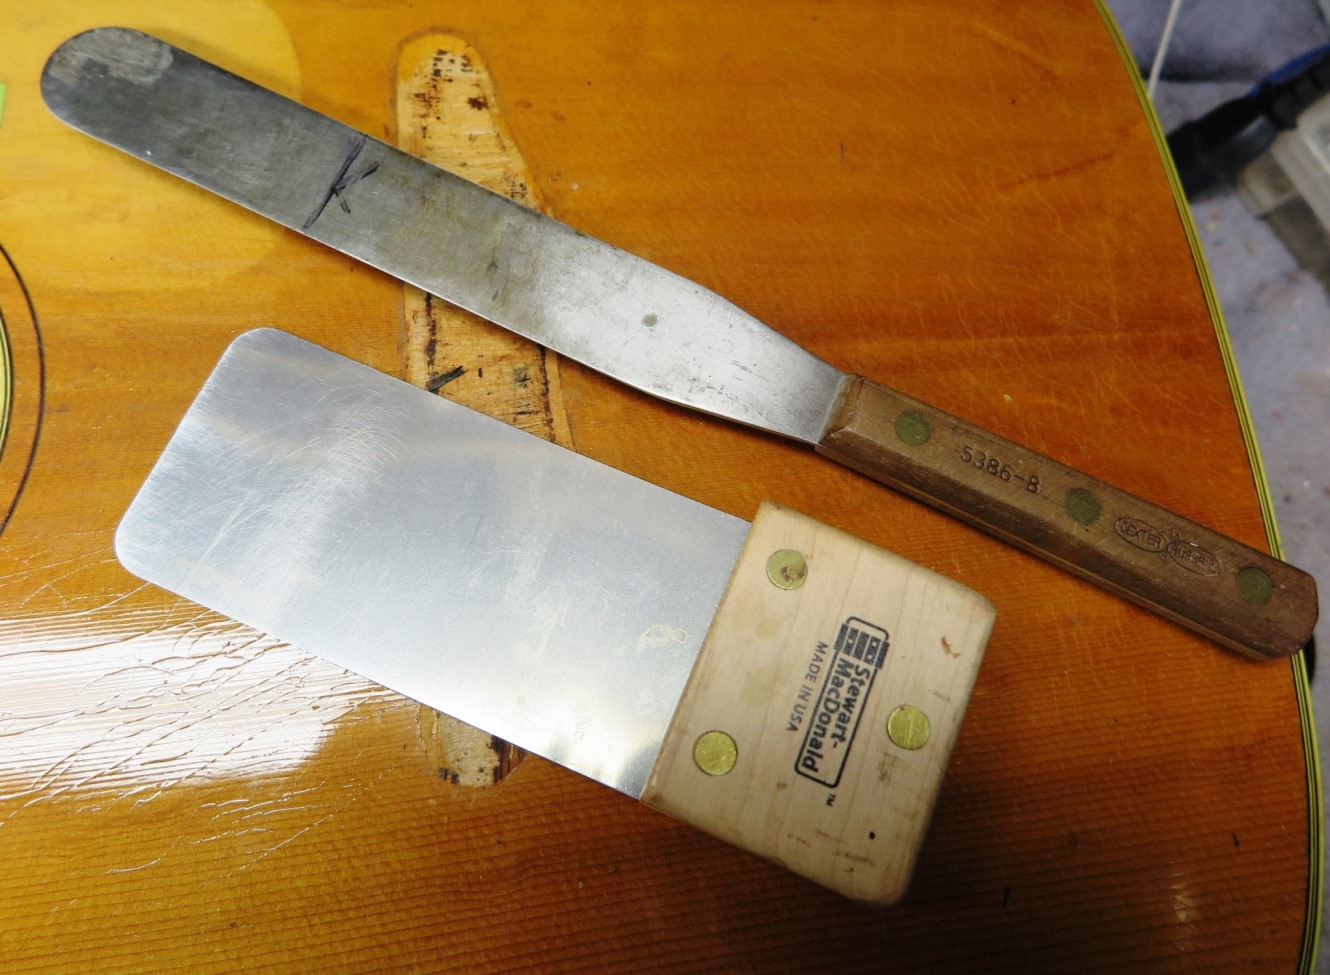
(7)Use the 4466 tool at a angle as shown below.
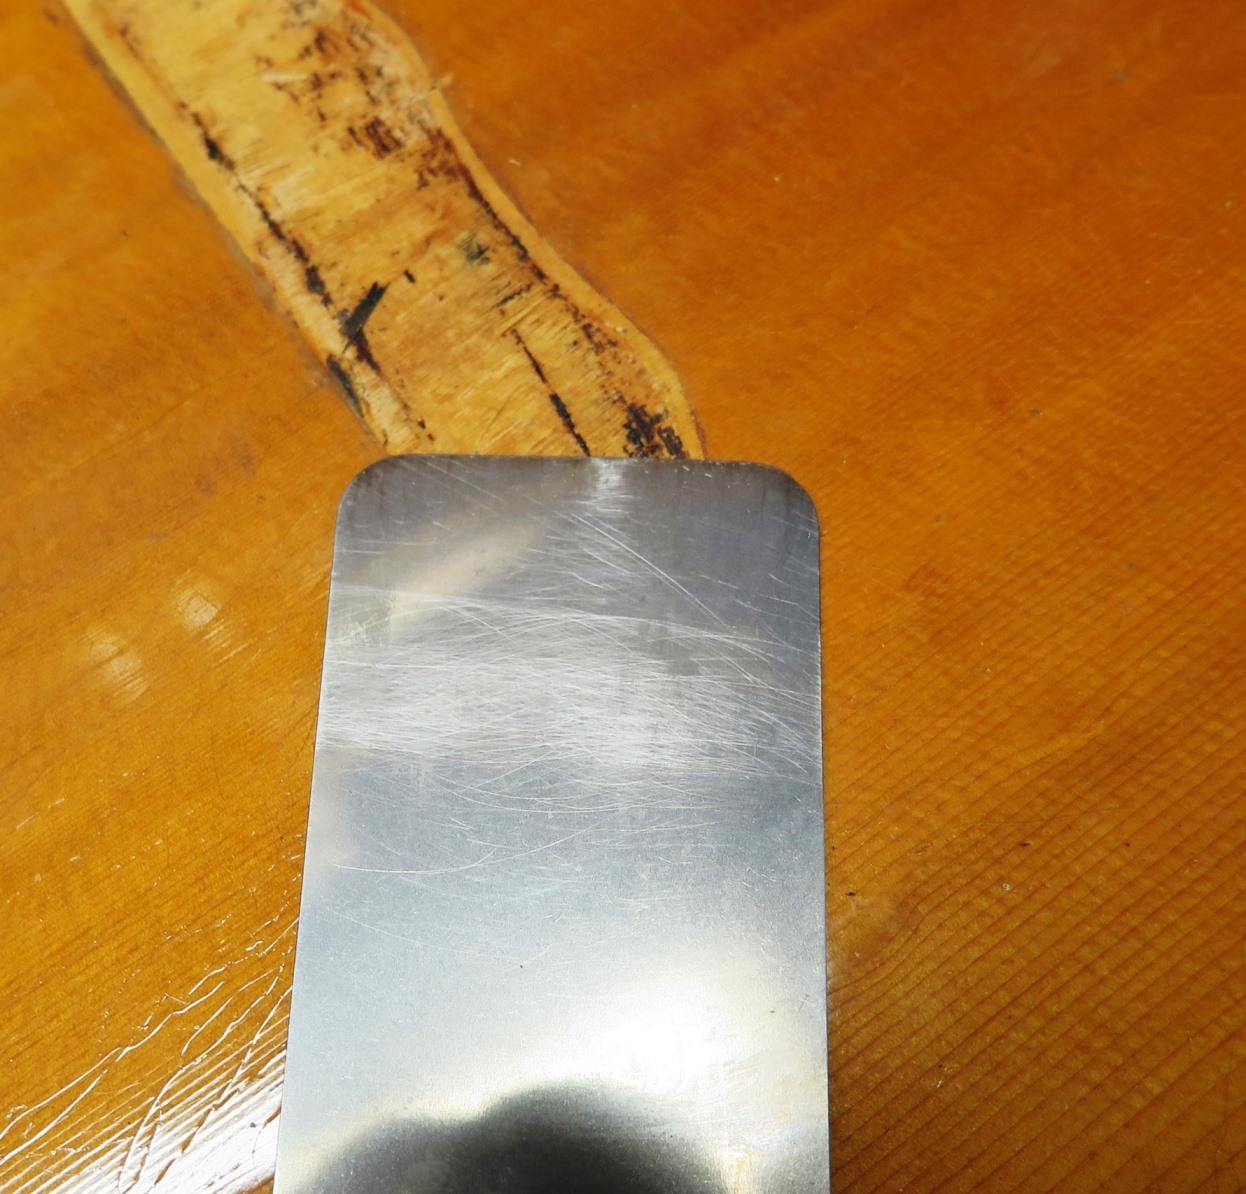
(8)Bridge removed
Avoid all other Stewmac spatulas and pry tools on bridge removal. They are great for other purposes, but not bridge removal. The reason is they are too short and they have a cranked blade. A cranked blade drastically reduces the power of the tool when pushed or hammered under a recalcitrant bridge.