Cone Sander for the Table Saw
Rating: ***** (out of five stars possible)
Forget this if you don’t have a table saw. This tool is useful on any 10 inch or larger table saw. Sears used to sell an 8 inch. Now only 10 inch version is available. The Woodtek 95-430 disk is no longer manufactured. You might find a used disc.
A cone sander is a 10 inch diameter aluminum disk installed in place of the saw blade on a table saw. It is approximately 1/8 to 3/16 inch thick. One side is flat. The other side is cone shaped not including a 3.5 inch flat center section. The cone has a 3 degree angle from outer edge to center. Use high strength rubber cement to stick a specially made disk of 150 grit sandpaper to the cone side.
The geometry of how this thing works is quite interesting. The intersection of a cone and a flat plane is a straight line. So, if you tilt the face of the cone towards the table saw fence until that line is 90 degrees to the table top, you have in effect a low capacity vertical jointer. Tilting the cone results in a sanding surface similar to a drum sander. The wood piece is then pushed through the gap between cone sander and fence.
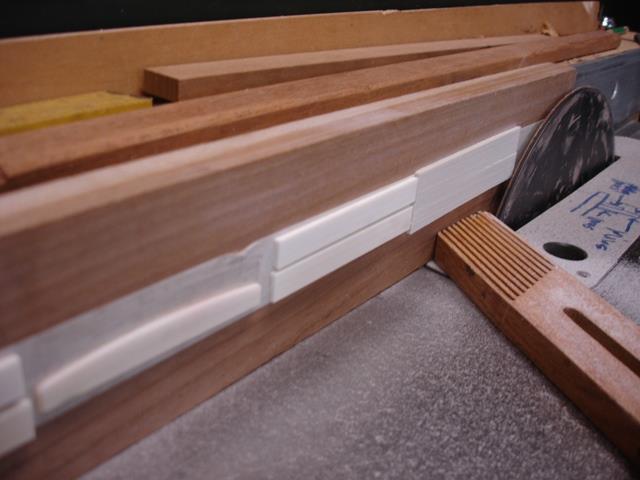
Dimensioning Saddles
We use this tool In our shop for precision dimensioning of braces, purfling, binding strips, patch material, stock strips, head stock plates, bridge blanks, neck blanks, bone and tusq saddles and nuts. The capability to thickness bone nut blanks to exact thickness to fit odd sized nut slots is invaluable. I prefer the cone sander to any similar function on a drill press because the feed rate is drastically faster and because the disk is turning so fast the finish is excellent. Also, there is much less chance of kick back as opposed to a drum sander running on a drill press. The drill press setup is much less convenient because adjustability and therefore accuracy is far more difficult.
Take very light cuts. This is not a high volume material removal tool.
Control over how much material is removed is either by moving the fence or, most conveniently, moving the arbor up (deeper cut) or down (shallower cut). Depth of cut adjustment on a table saw is extremely precise.
Now, a cone sander can not remove huge amounts of material but it can make the sides of a long strip of wood exactly parallel and straight. It is not humanly possible to plane a wood strip straighter, flatter, or with more perfectly parallel sides than a cone sander can. It is even better than a planer with the limitation of small material removal capability.
For long thin pieces, this is the luthier’s friend. You can’t do very thin parts shorter than approximately 10 inches but you can sand longer pieces and cut to length. To thickness sand a head stock plate, band saw several feet of ebony or rosewood to, say, 3/32 or 1/8 inch, and use the cone sander to dimension the long strip down to 1/16 or whatever I need. You then have a strip ready to cut into several head plates.
Set up takes practice.
To precision dimension nut or saddle blanks attach one or more small items with two-sided tape to a straight stick or board (dimensioned straight and square with the code sander) then run the assembly through the cone sander. You can thickness sand twenty saddle blanks at one time this way. I can’t image doing twenty saddle blanks as quickly or accurately using a drill press drum sander. And, a cone sander works great on the smallest cheapest table saw available. We have a second table saw set up permanently with a cone sander which is always ready for use.
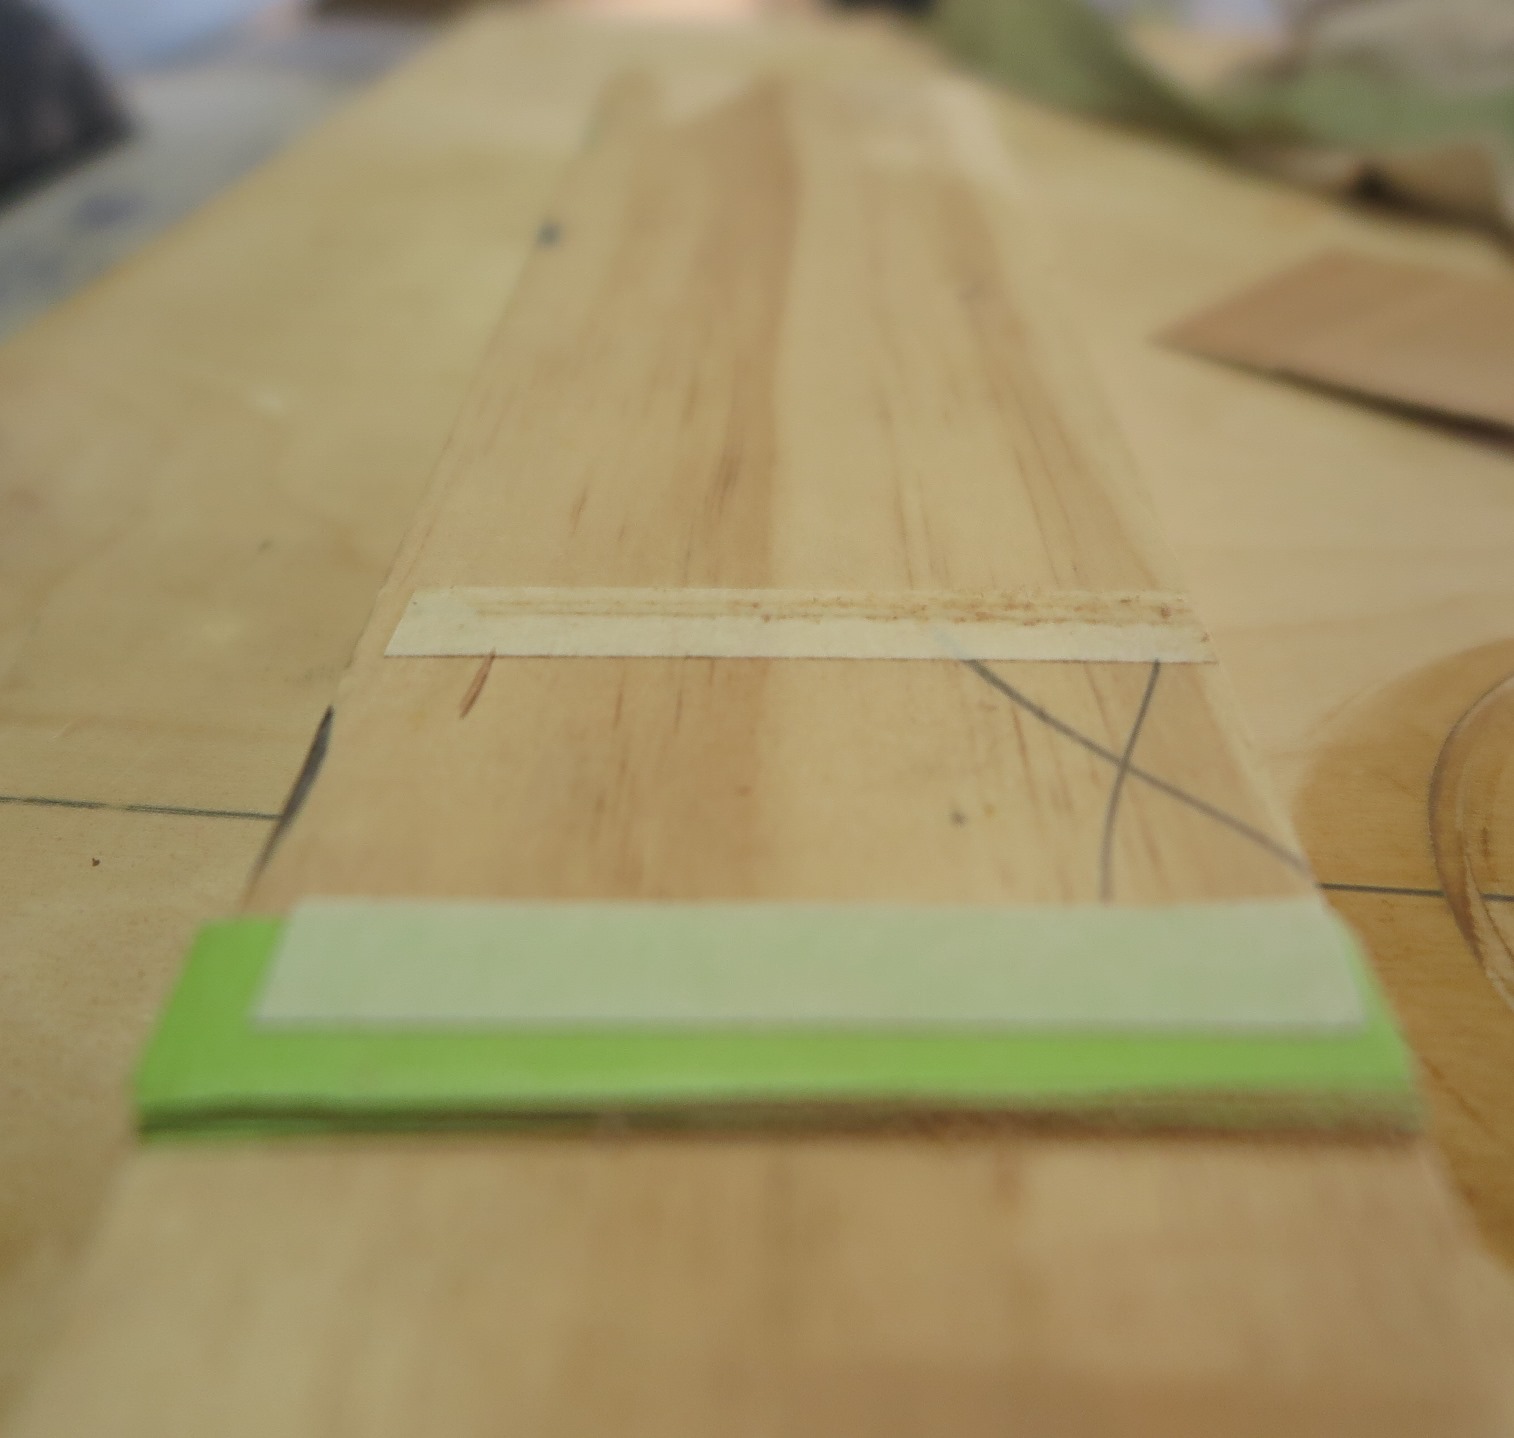
Making Fret Board Extension Wedges
Here I am making a very thin wedge. This will attach under a fret board extension when the neck angle for a decent action set up is very high at the guitar top.
This image shows set up for sanding down a thin block of mahogany down to a wedge. I start with a block sized a little wider than the fret board extension and to the correct length. Also final length is correct. There are 30-40 strips of green tape applied at right angle to a straight flat 16 inch board. The green tape thickness is a little less than the thickness of the wedge that I need to fill the area under the fret board extension. Then two strips of 3/8 inch wide double stick tape.
This shows the wedge sanding operation completed. The code sander sands down the wedge so that one edge is as thin as a piece of paper.
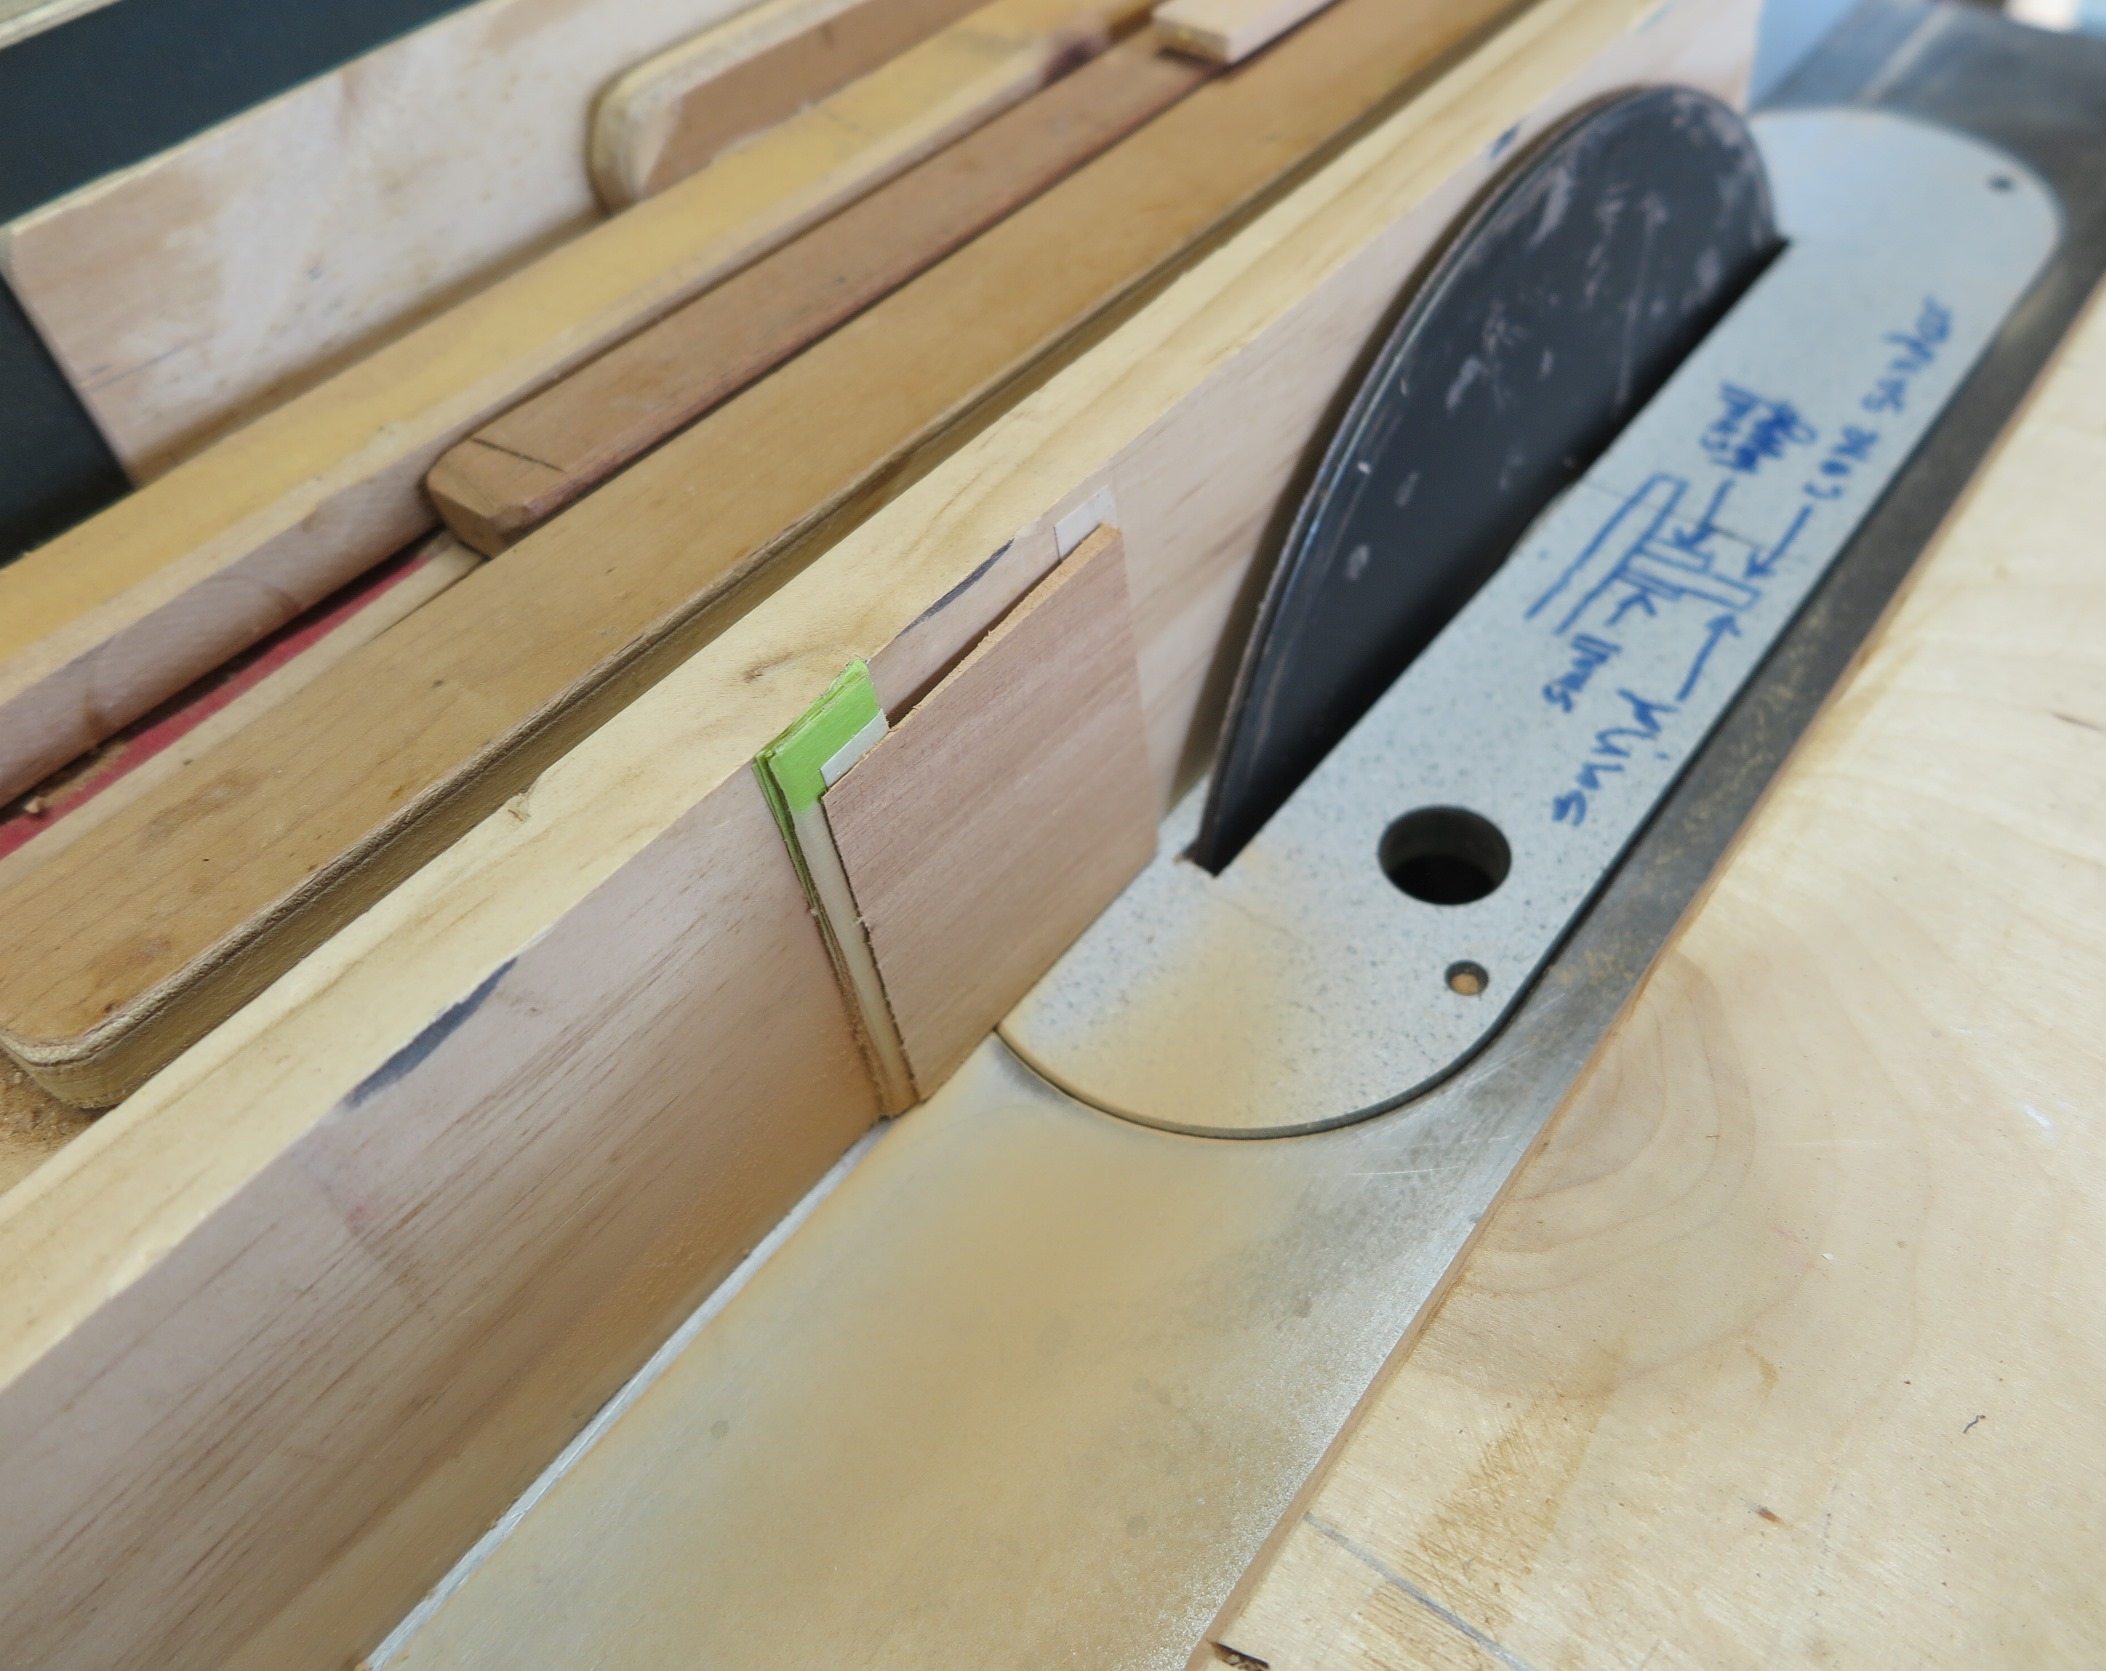
This is a terrible image, but I could not get my camera to focus on the edge. You might be able to see how amazingly thin the block is. Hate to think of doing this with a plane. Total time to completion was about 15 minutes including set up. Accuracy is perfect.
Most hardwoods can thickness down to 1/16 inch though I have worked a piece or two down to 1/32 inch. Spruce can handle 1/8 inch generally.
The cone sander is truly a precision thicknessing tool. I am not trying to sell you anything, just passing alone a helpful hint.
©2021 D.R. Hanna