How To Apply 3M Adhesive Sheet (Stewmac #4597) To a Pick guard Prior To Re-Attachment
Note: Right hand guitar.
- Tools
-
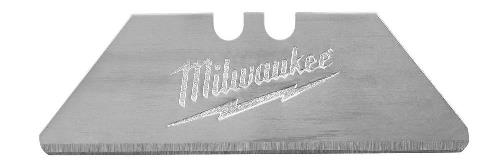
- One carton type blade such as the Milwaukee version shown. These have rounded corners and won’t scratch the plastic.
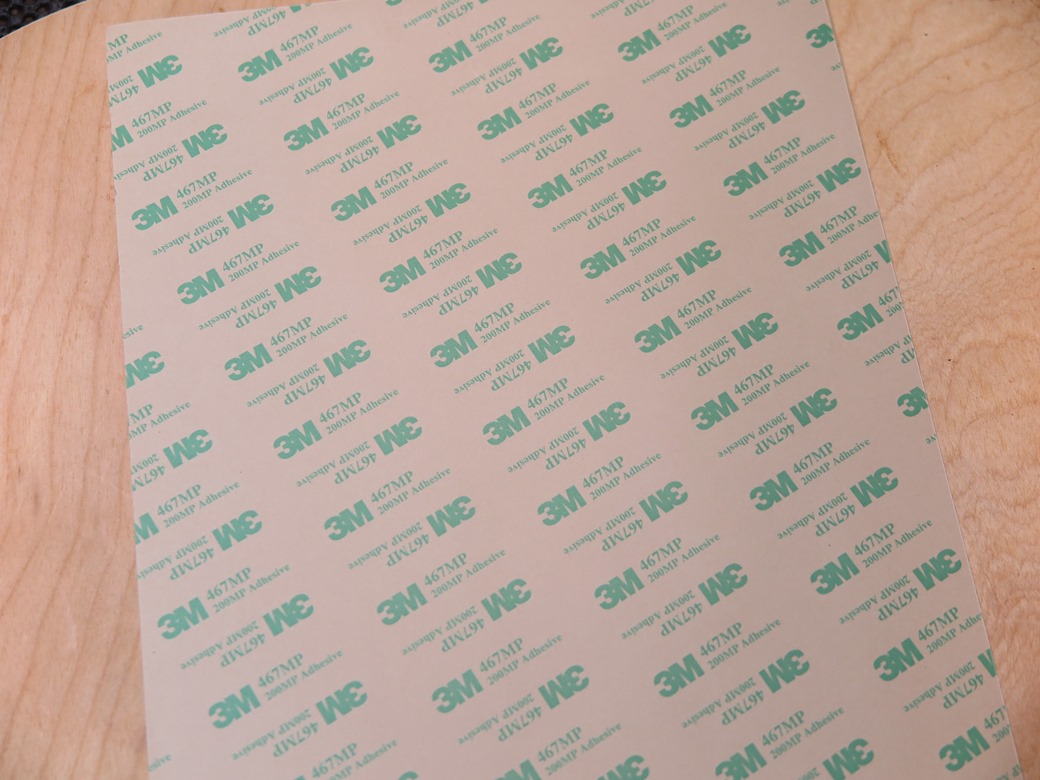
- One sheet 3M two sided adhesive as shown.
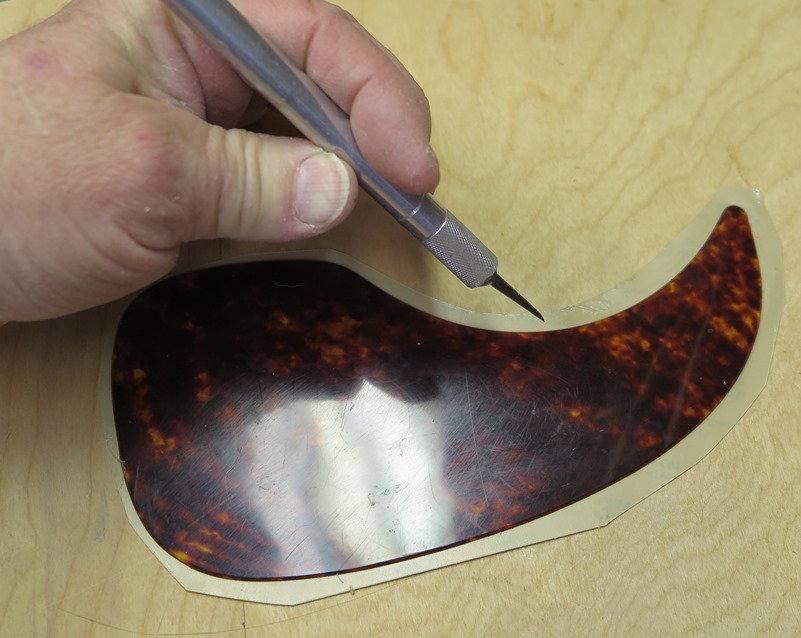
- One Xacto handle and blade, sharp pointed.
- Pair scissors
-
- Steps
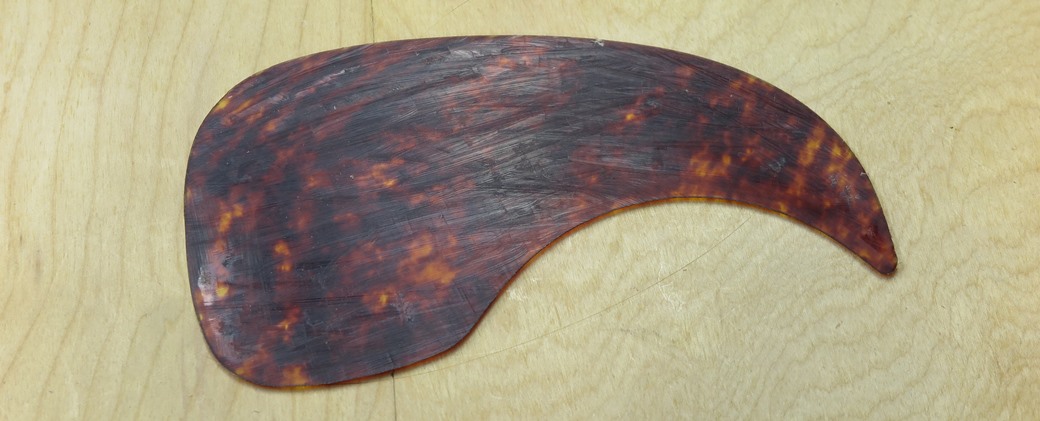
- Flip the pick guard good side down on a flat surface.
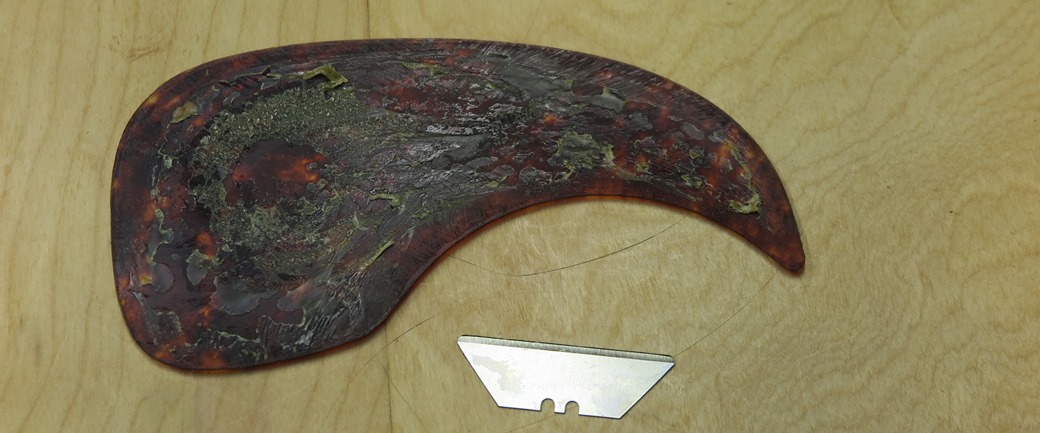
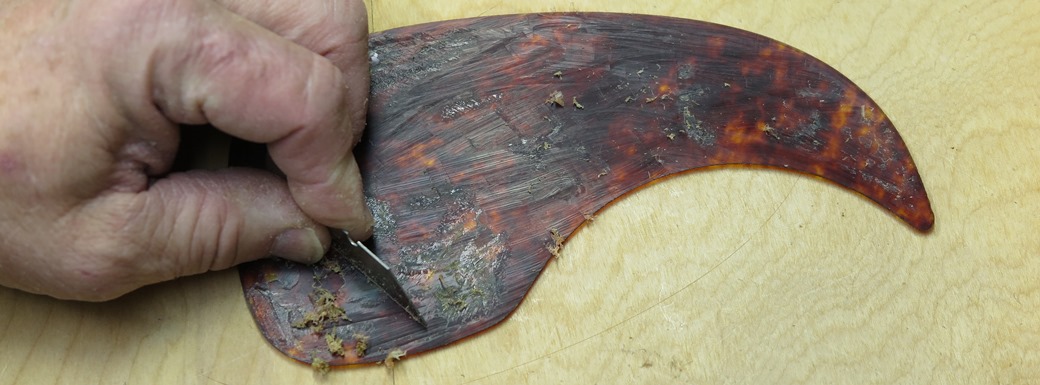
- Use the carton blade to scrape off all glue residue. Surface should be clean and smooth.
This is fairly easy to do if the guard was removed from an original Harmony installation.
- Lay the 3M sheet clear or blue side down. Paper side must be up
- Put the guard on top of the 3M sheet good side down.
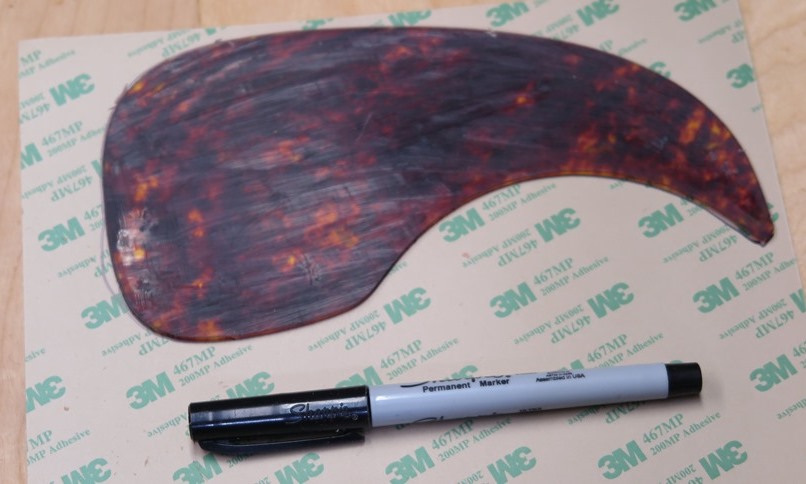
- Trace around the guard onto the 3M sheet.
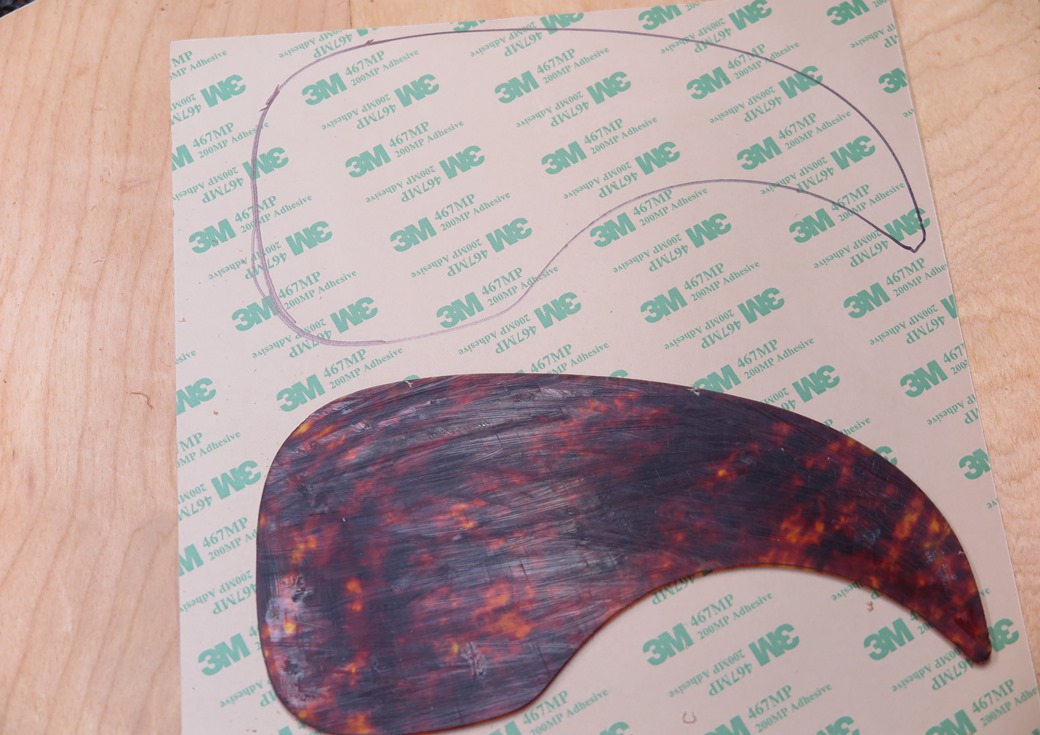
- With scissors cut around the tracing on the 3M sheet. Leave at least one quarter inch extra space around the tracing.
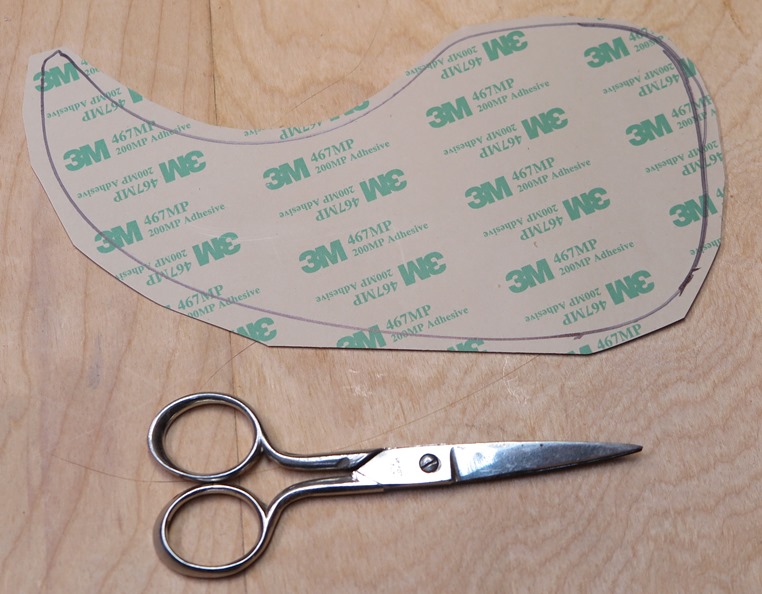
- Remove the clear or blue side backing from the pick guard shape just created. The paper side should stay on the 3M sheet at this point.
Lay the pick guard shaped 3M sheet on the work surface, paper side down.
- Stick the guard to the adhesive making sure some 3M backing paper shows around all edges. In other words, leave the 3M sheet on the working surface and
lay the pick guard scraped side on to it.
- Ensure the 3M sheet is well adhered to the pick guard.
- Turn the guard/3M sheet good side up.
- Use the Xacto to cut away the excess 3M backing paper.
- Before attempting to apply guard to guitar top wood, and before removing the 3M backing paper, do several trial runs (5 or 6) if you have never stuck a guard to a guitar before. Make sure you know exactly where the guard goes on the top in relation to the sound hole and the bridge. The 3M two sided adhesive cannot be moved once it is stuck to the guitar. 3M adhesive is long term permanent.
- Remove 3M backing paper
- Apply to guitar. Suggest orienting to the sound hole rosette rings first.
©2016 D.R. Hanna