Making Dovetail Shims
This pertains to making shims for acoustic guitar dovetail fitment. You have already adjusted the neck shoulder areas for accurate alignment. You have double-checked intonation measurements. The center line of the fret board aligns with the center of the bridge. And the plane of the fret tops aligns with your desired location at or above the top of the bridge. These two measurements ensure that the strings will align with the neck sides and that the saddle will have sufficient height standing proud of the bridge top.
So at this point, the dovetail no longer fits the dovetail socket in the guitar upper bout. You may well have removed considerable wood from the neck butt-end shoulders to achieve the foregoing alignment. Time to install dovetail face glue surface shims.
Accurately adjusted dovetail faces using shims is critical for neck stability under string tension. You want to create two dovetail cheeks which align with the two socket cheeks, resulting in a tight fit for the length of the dovetail mating or glue surfaces. You sure don’t want the neck coming loose from the guitar body.
The best possible shim wood is American Cherry. No other deciduous hardwood accepts glue better. For hundreds of years, Cherry was and still is the timber of choice for fine furniture. Proof of this is how nicely Cherry accepts stain. Only Holly soaks up stain better than Cherry, but Holly is too soft. We want a hard wood that will not compress while the neck is under string tension. Not to mention that Cherry sands and chisels beautifully if grain orientation is correct.
Small pieces of Cherry are available from Woodcraft.
The procedure for making dovetail shims has the following steps:
- Cut shim stock to 3/4 to 1 inch width. 1/32 or 1/16 inch thickness is assumed. Per these steps, this will result in two shim pieces. Grain is long wise. It is best to use quarter sawn stock, but plain sawn will work.
- Cut shim stock to match the length of the dovetail face, not the dovetail socket face. Alternatively, you may want to fit the bottom half of the joint followed by fitting the top half.
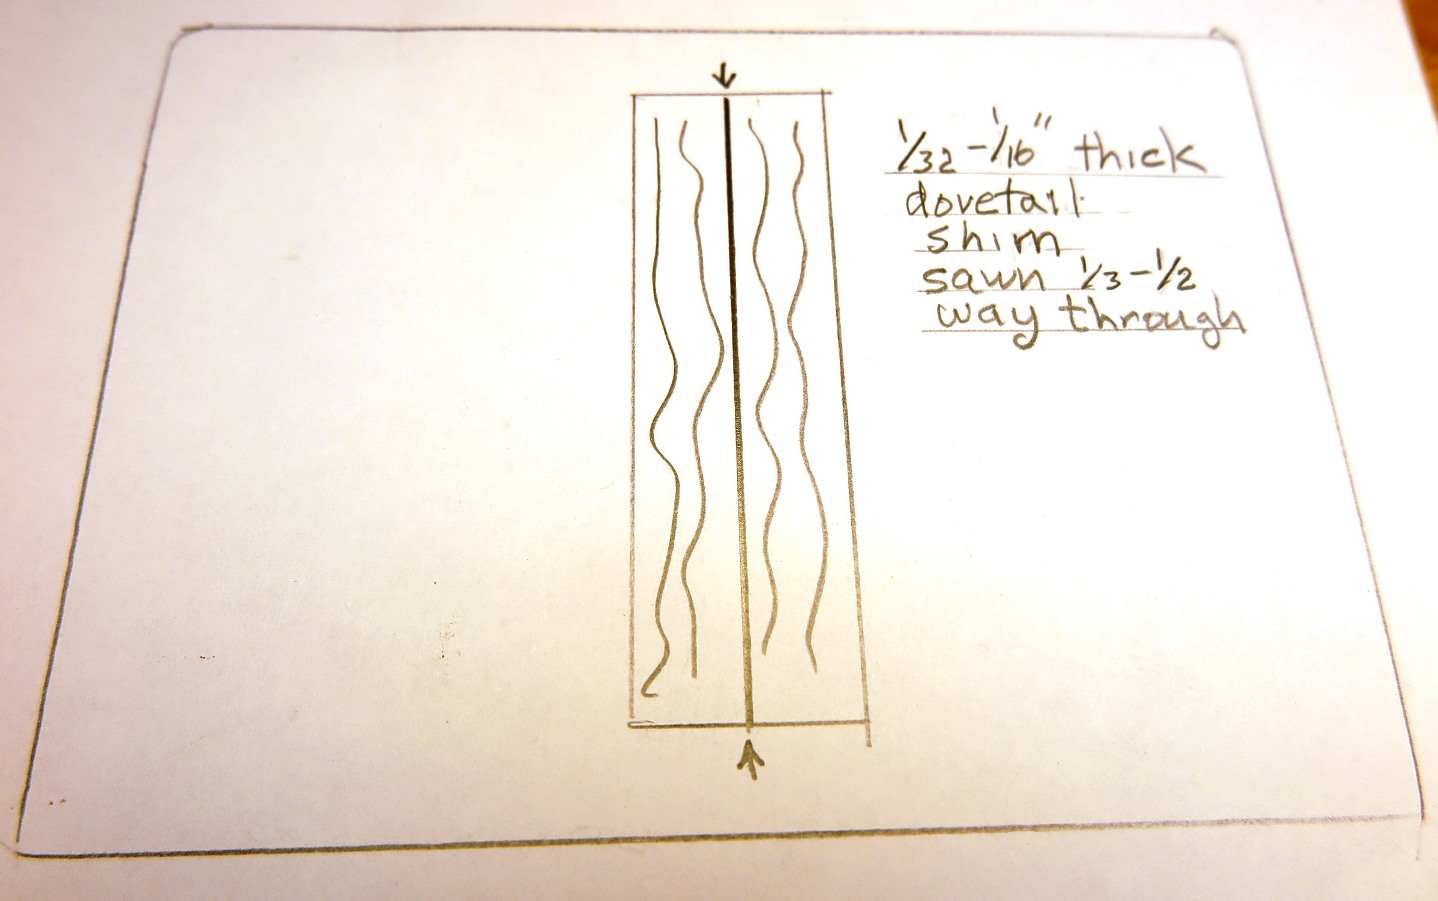
- Score or cut part way through the center of the shim stock. The shim should have a very narrow groove cut length wise with the grain and only 1/3 to 1/2 of the way through the shim thickness.
- Using just your fingers, snap the scored stock pieces in half and keep the halves together temporarily. Pay attention to the resulting grain fibers where the pieces broke.
- Reference the diagram below.
The diagram below shows shim stock cut to approximate length and width.
On the diagram below, note the diagonal fibers resulting from splitting the shim stock. The arrows show which way to glue the shim pieces to the dovetail cheeks. (A previous article explains why gluing shims to the dovetail cheeks is friendlier than gluing to the socket cheeks.) Using this method, your chisel cuts are much easier because the chisel will not dig into the shim but will shave very fine cuts as you work towards the best possible dovetail fitment.
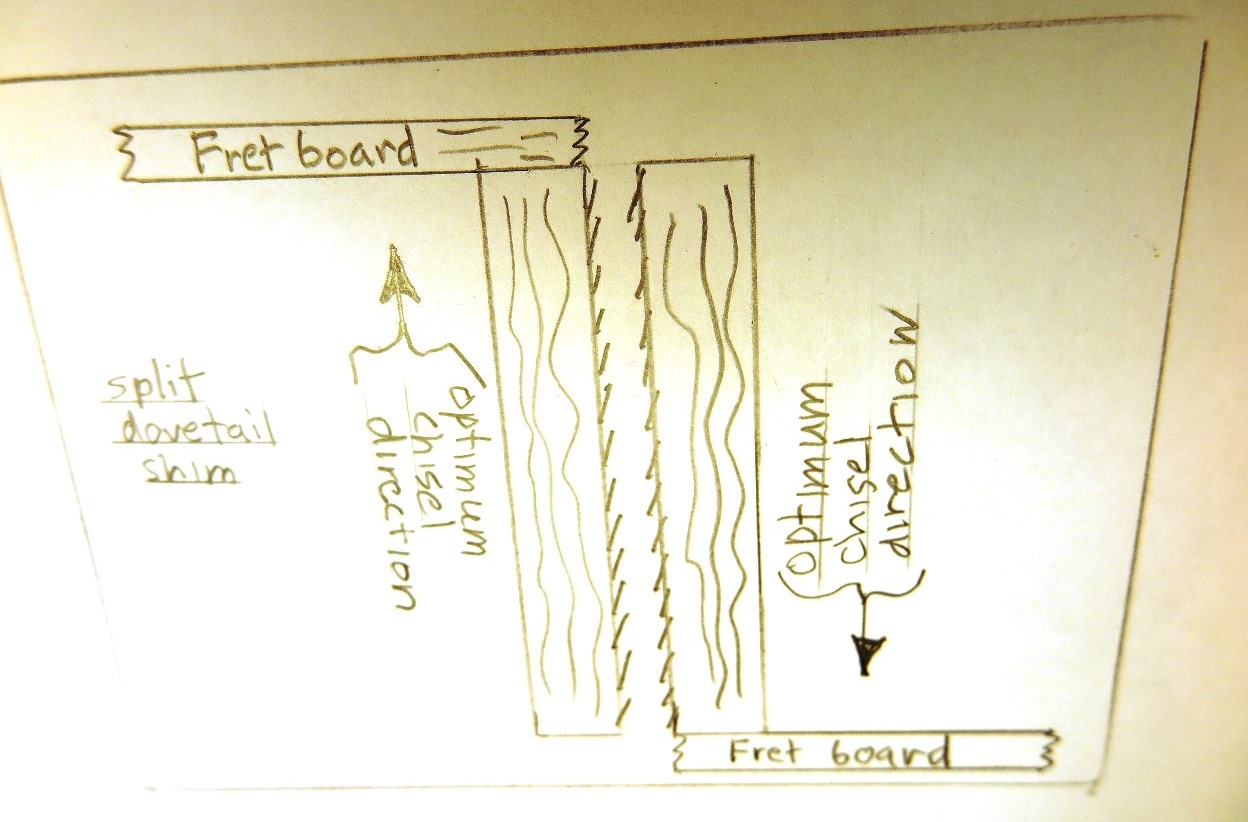
The foregoing works nicely 90 percent of the time, assuming you have chosen good quality shim stock. Of course, diagram number 2 exaggerates the fractured grain. The fractures are usually visible, sometimes not. However, you can detect grain direction by feel in most cases. The fibers will "snag" your skin thereby pointing in the best direction for chisel work as shown in the diagrams. Anyway, luthiery is about feeling good about good feelings. Oh man!
©2021 D.R. Hanna