New Dimensions In Neck Angle Setup
After more than a century of building acoustic guitars, there are millions of vintage instruments needing a neck reset to remain playable. This means refitting the neck to body joint. Hopefully this results in acceptable string height and correct fret board to bridge alignment.
This article suggests an improved way of adjusting and shimming the sliding tapered dovetail joint found in most vintage guitars. There are exceptions such as the Mossman bolted mortice and tenon and the Taylor wedge adjusted and bolted neck joint. Those neck joint systems are not covered here.
There are many methods for adjusting and reattaching the neck to the acoustic guitar body. I am sure they all work well for each repair tech. However, from my fairly extensive research on the internet and through the books I own, I see two problems left unsolved in all the methods: shim fitment and testing neck alignment. These are the two issues I want to tackle here. I am not suggesting this is the only method. I am hoping to present techniques not seen anywhere else and improving details which are shown elsewhere.
Hopefully you are not the guy who fills the dovetail socket with glue, shoves the neck in, and wipes off the squeeze out. If so perhaps you should look for another hobby or line of work.
Just for a review, neck resetting requires two steps: alignment and fitment.
ALIGNMENT
Assuming an existing bridge the fret board center line must align with a line centered between the third and fourth string pin holes or bridge string holes and parallel with the fret board center line. Call this "string alignment". Use a flexible 30-inch straight edge to check this. Also, the curved or flat plain of the fret tops must align somewhere at or above the top of the bridge. Call this "action alignment". Use a stiff straight edge to verify this. A cherry wood straight edge is best because it won’t mar the fret tops. The goal of action alignment is excellent play action so that string height measured at the scale length mid-point is 3/64" to 5/64". However, in the case of a curved fret board, the saddle top is cut in an arc so the strings will align with the curve of the fret board. This detail is left to the repair tech and is not covered here.
Determine string and action alignment by adjusting various places on the neck shoulder. Details follow below.
FITMENT
After alignment is perfected the dovetail glue surfaces must be corrected resulting in two perfectly matching or aligned or parallel glue surfaces. Very thin slices of wood called shims are used to accomplish this. Shims are required because removing wood from the shoulders loosens the dovetail joint. Keep in mind that the entire strength of a sliding tapered dovetail joint depends on two approximately 2 inch by 3/8 inch glue surfaces. This is all the neck joint has to resist over 100 pounds of string tension. After all, this is a blind joint. It is impossible to see whether the new shims are fitted correctly. More important, all adhesives appropriate for dovetail attachment require tight-fitting glue joints. The only glues appropriate for dovetail attachment are PVA (polyvinyl acetate such as Titebond or Elmer's, etc.) and hide glue. I know a lot of builders and manufacturers use PVA but in my opinion, only hide glue is appropriate.
To make matters much worse, it is very common for the factory dovetail joint fitment to be very poor on some vintage guitars. No wonder so many low-cost guitars have loose neck joints. This fact alone makes refitting the blind sliding tapered dovetail joint fitment even more difficult. And kudos to Martin, Gibson and Guild for manufacturing absolutely perfect dove tail neck joints. At least, I have never seen a sloppy factory dovetail on those guitars.
Before correcting the dovetail joint, remove all traces of PVA glue from all mating surfaces. Hide glue and PVA will not stick to old PVA glue. However, new hide glue adheres nicely to old hide glue. This is just another reason to stick with hide glue.
OK, so on with the details.
FITMENT AND ALIGNMENT DETAILS
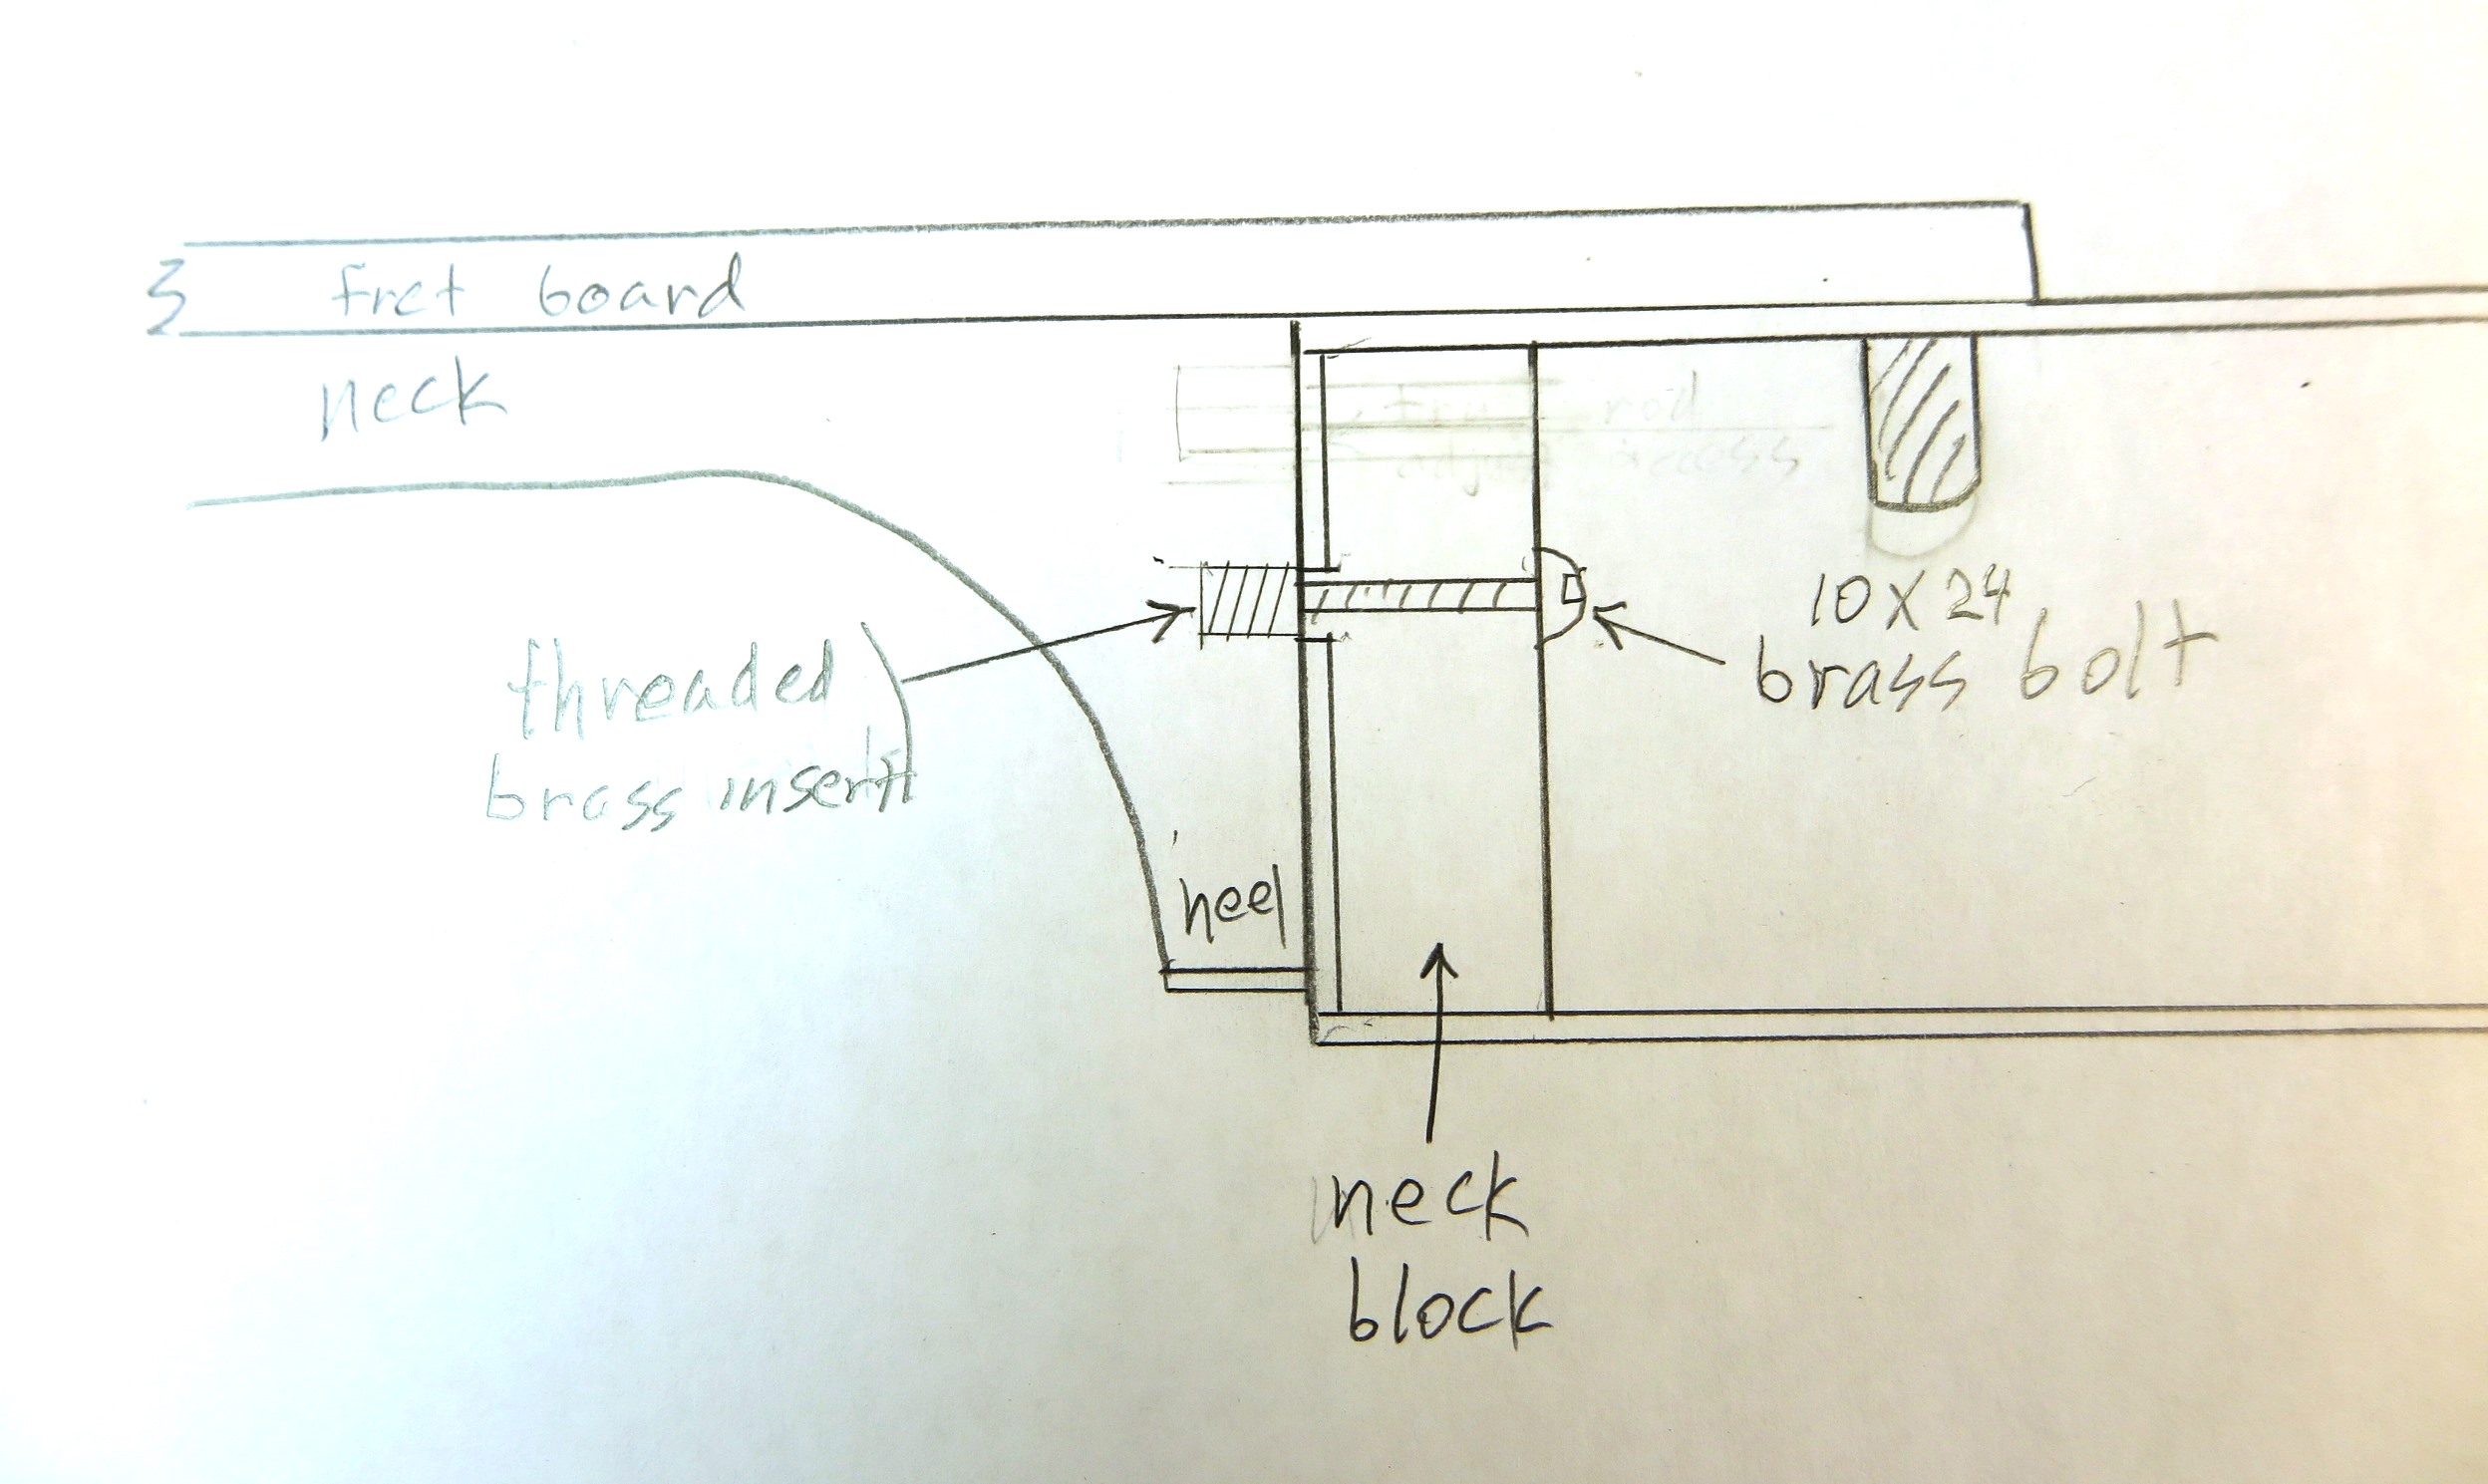
Please reference the diagram below. This is a drawing of the dovetail end of the neck. Please keep in mind, glue is never (never!!) applied to the shoulder areas. Adding glue to the shoulder areas differentiates the rank amateur from the professional luthier.
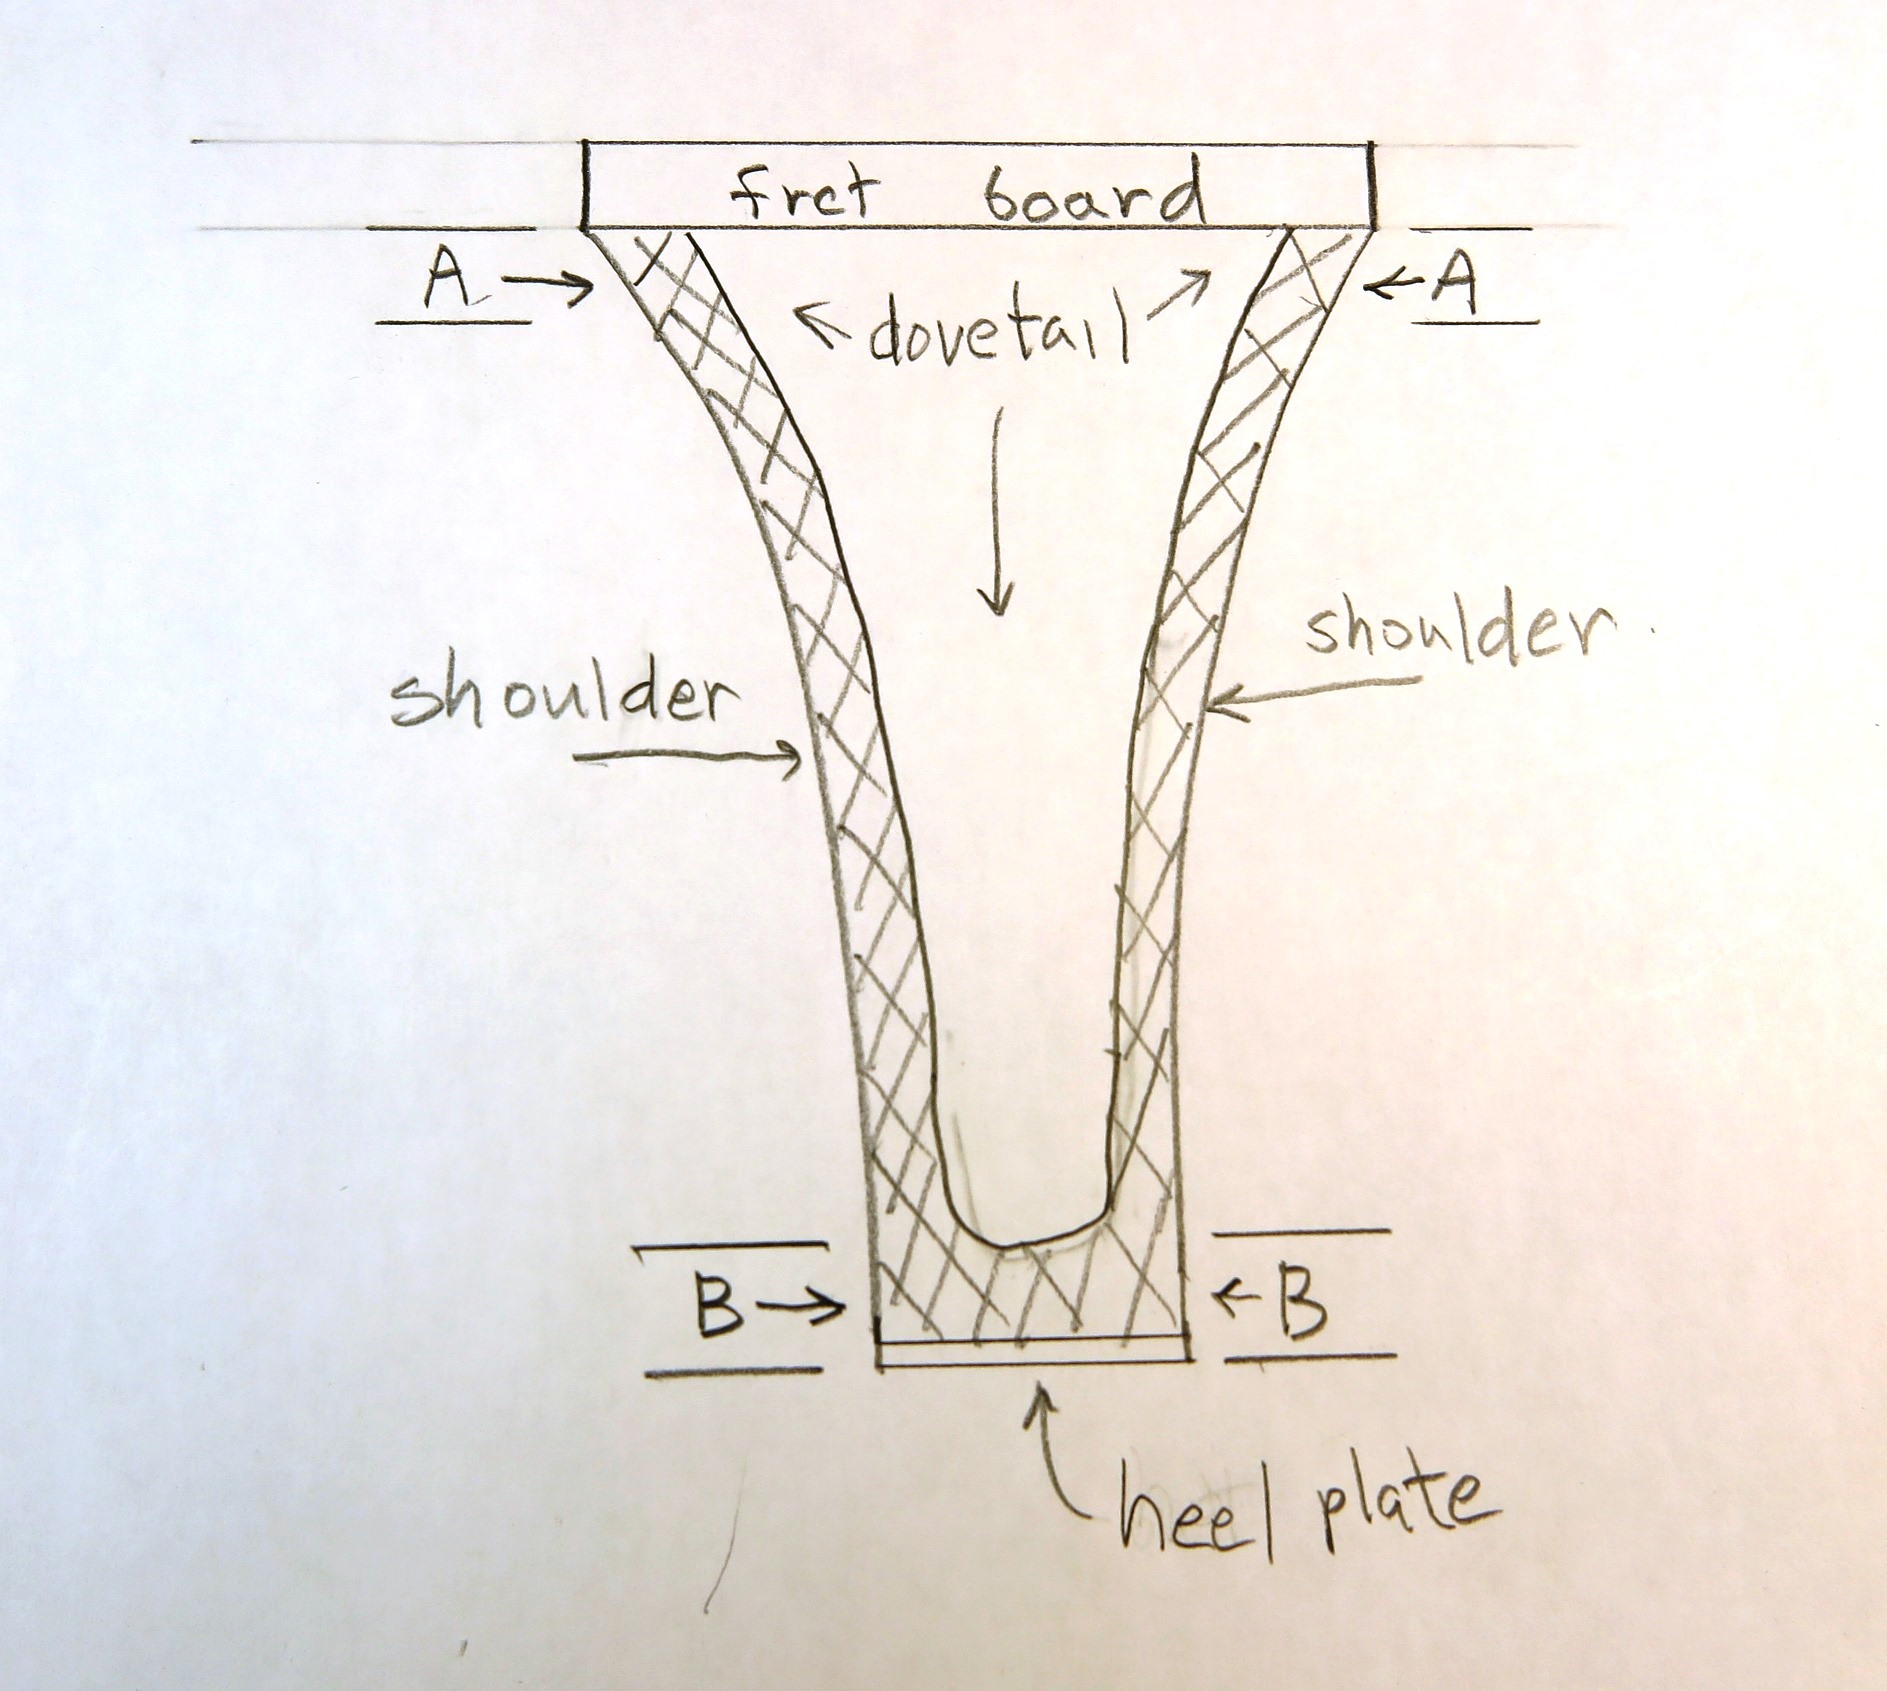
As stated above, the fret board must center correctly on the bridge and the action alignment must produce nice play action. Four shoulder to upper bout contact areas are labeled "A" and "B" in the diagram. All four points affect alignment. Areas "A" control fret board centering on the bridge. Play action or string height above the scale length mid-point is controlled by areas "B". Optionally, all shoulder areas between "A" and "B" on both sides of the dovetail can be very slightly sanded away such that no part of the shoulder touches the upper bout surface except for areas "A" and "B". Use a .04mm or thinner feeler gauge to measure this. A sheet of paper or 3 x 5 card is too thick. Using the foregoing technique makes neck resetting much easier and more predictable.
DOVETAIL FITMENT
The major problem with accurately adjusting the dovetail glue surfaces or "cheeks" is that the joint is blind. You can’t see whether the glue surfaces are making 100% perfect contact. Now I realize the following disagrees with 90% of all internet and book and video instructions showing how to fit a dovetail. But try it. I think you will like the approach suggested here better especially if you use the device suggested at the end of this article.
Instead of gluing shims into the neck block cavity, glue them onto the dovetail cheeks. In most cases 1/32 to 1/16 inch thick shims are good to start with. Use an easy to sand hardwood. Cherry is ideal. Cherry loves glue, chisels beautifully and sands easily yet retains hardness for a strong joint.
Never use cardboard shims. This is a sin against God and man.
First glue thin hardwood shims to both sides of the cheeks, but only the top half of the cheek faces or glue areas. Then apply sidewalk chalk to the socket glue faces.
See next image.
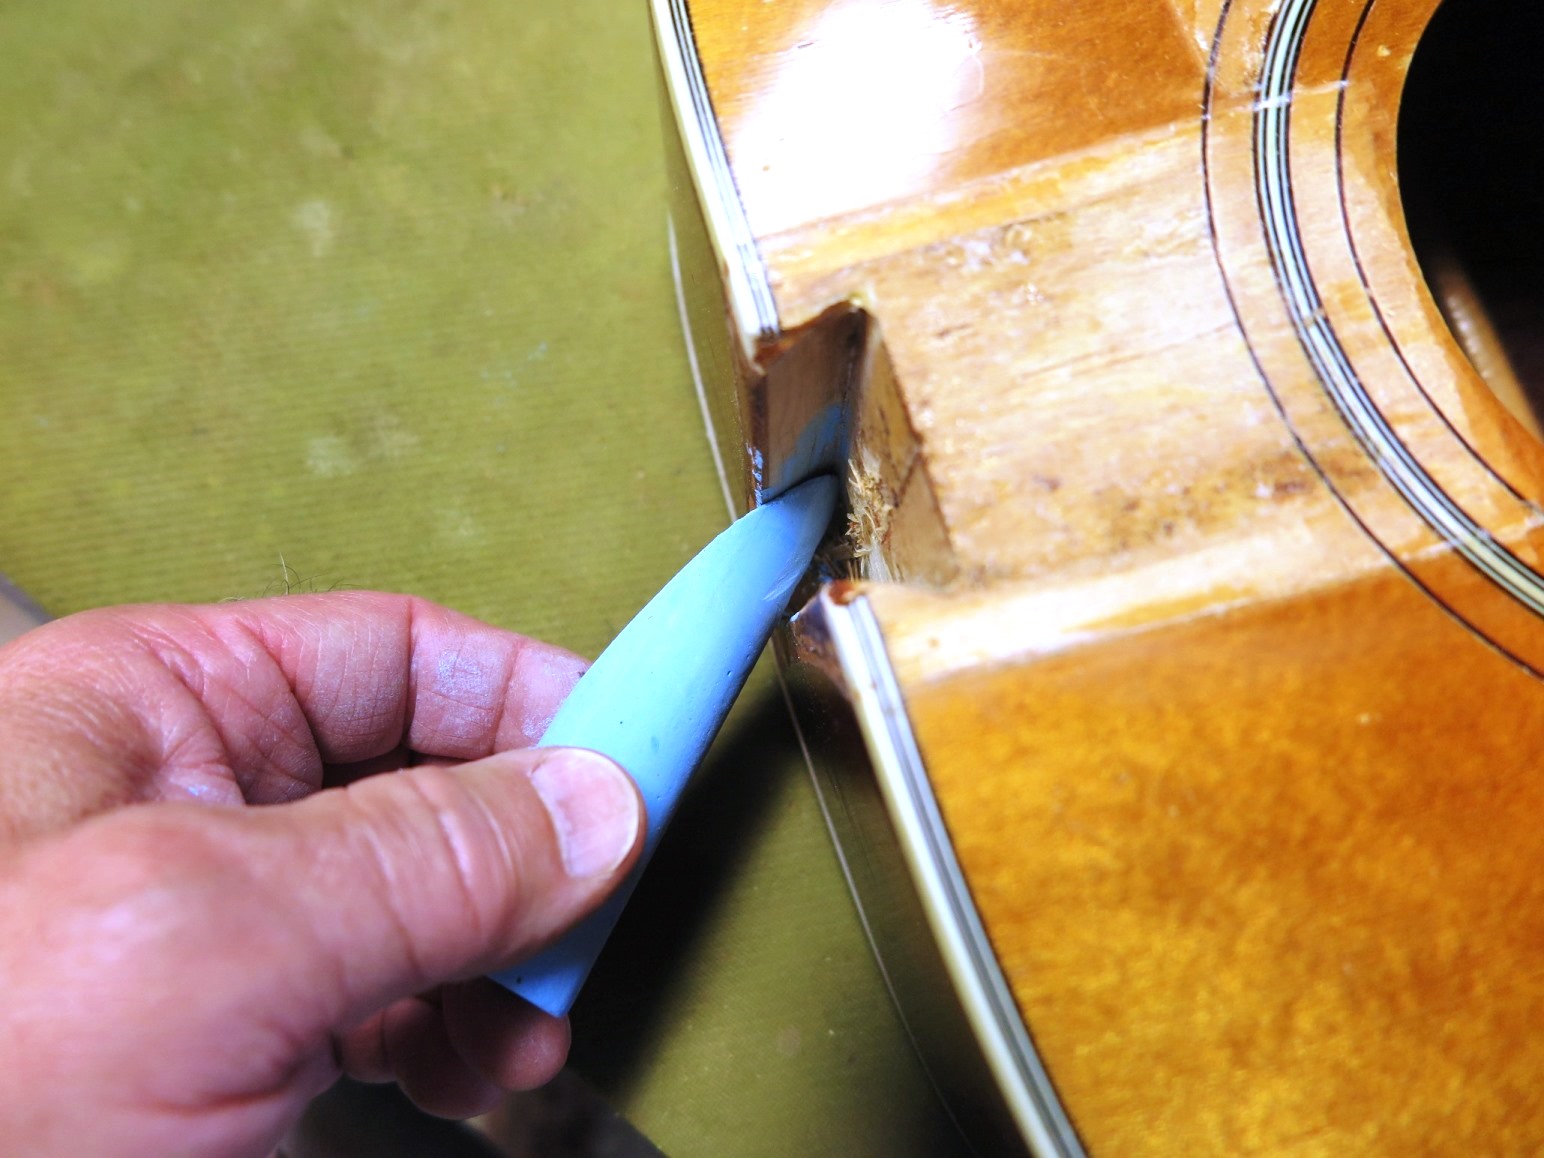
OK, that is a confusing image. It should show chalk being applied first to the upper half of the neck block glue surfaces. But you get the idea. Apply chalk to both sides of the neck block.
Below is an image of the chalk. Note the sharp angle sanded into one end.
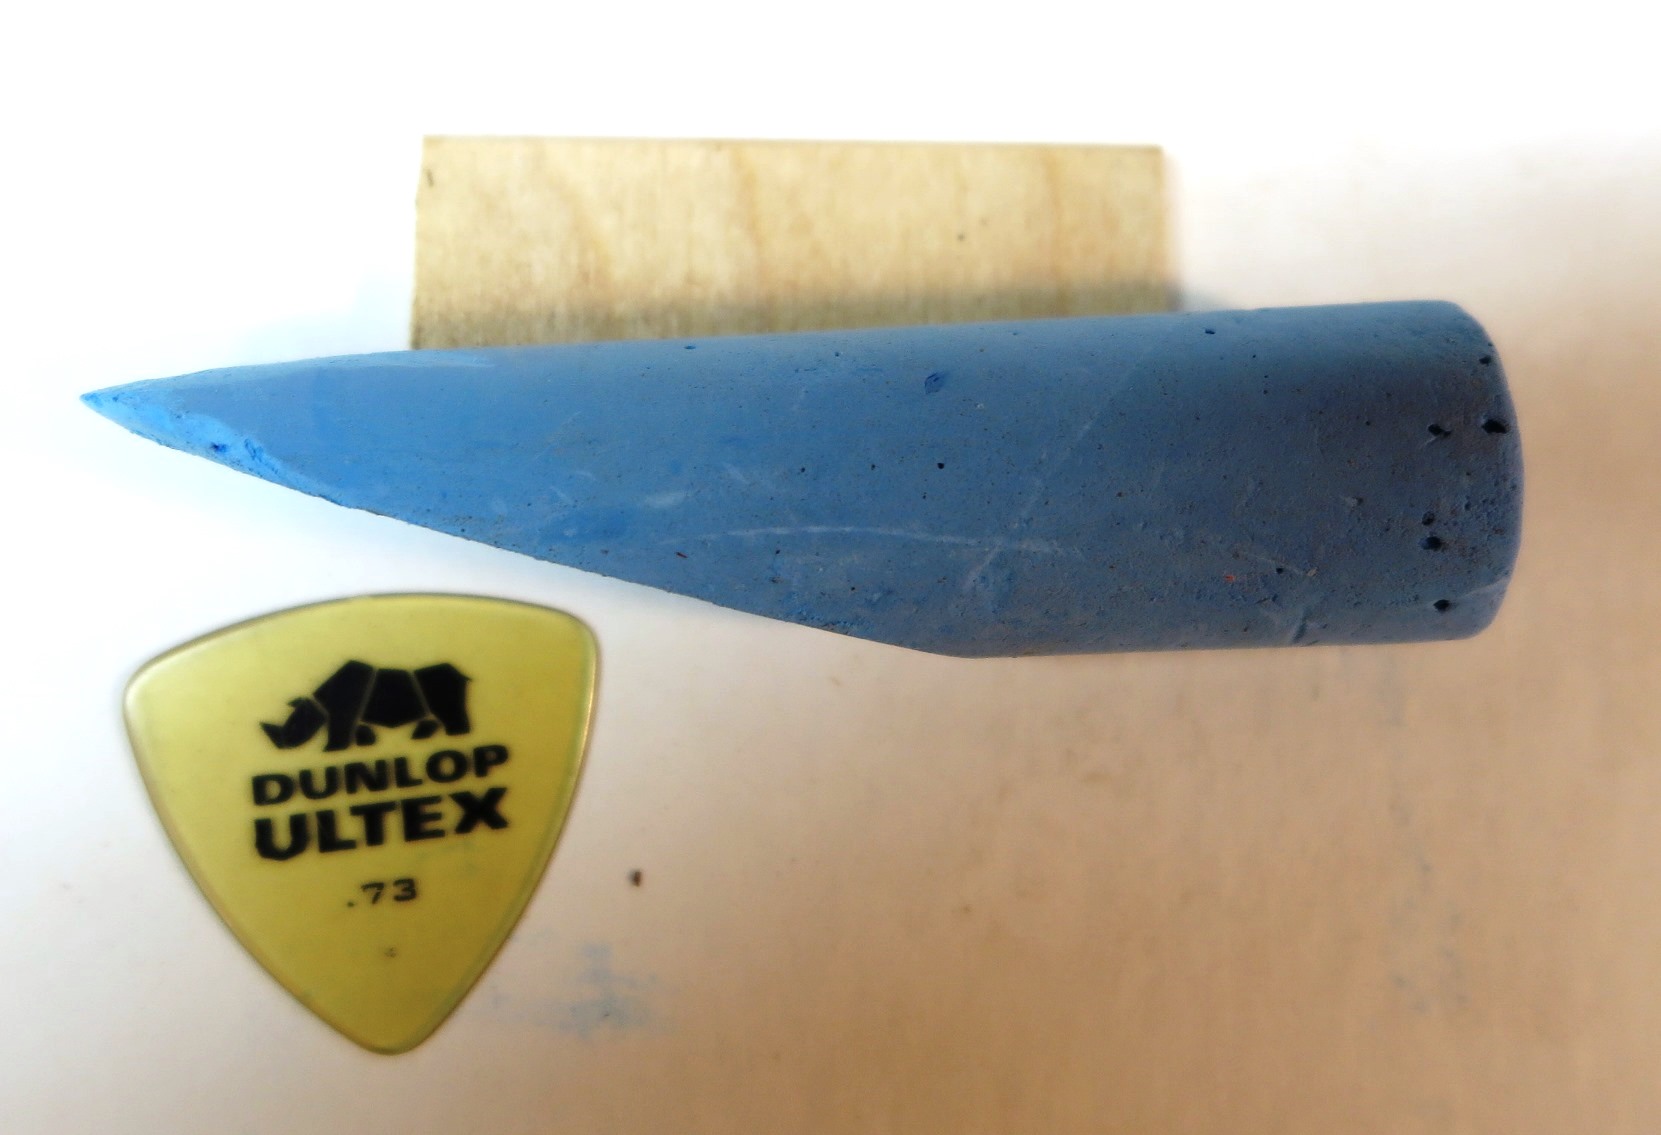
Please note, the above is chalk only. Some sidewalk chalk concoctions are a combination of chalk and wax. You want chalk only. The only way to verify that your sidewalk chalk is chalk only is to draw with it on a sidewalk. The alphabet or a happy face works well. 100% chalk wipes off or smears easily.
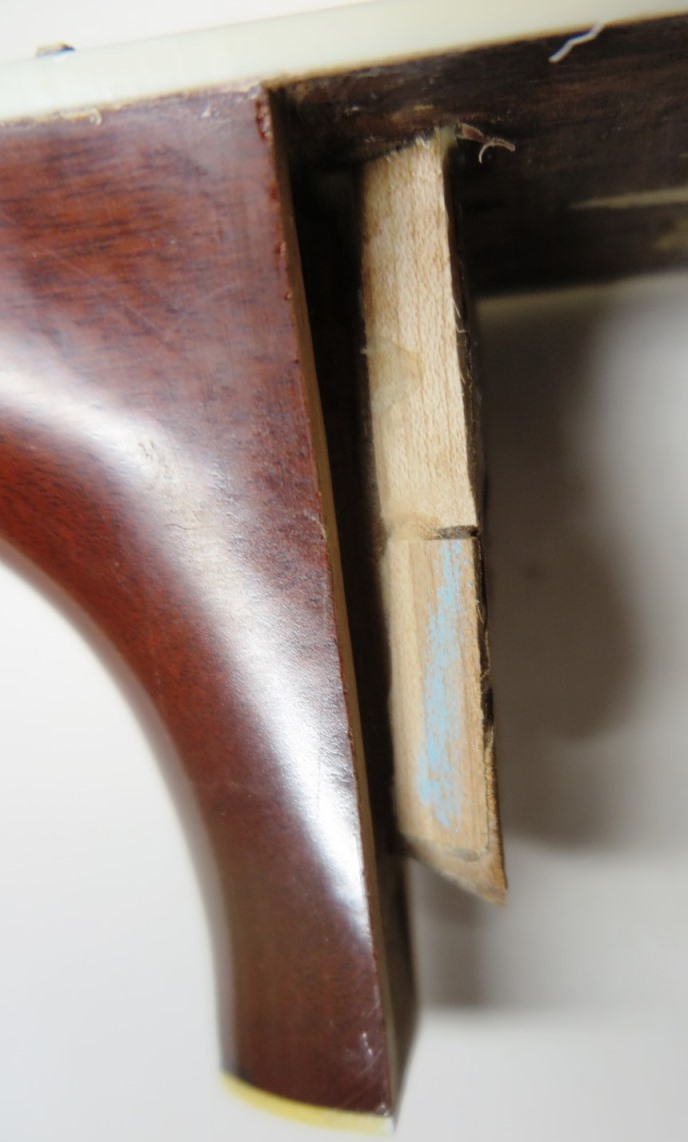
Next slide the dovetail into the neck block. Press down gently. Take care not to break off the fret board extension.
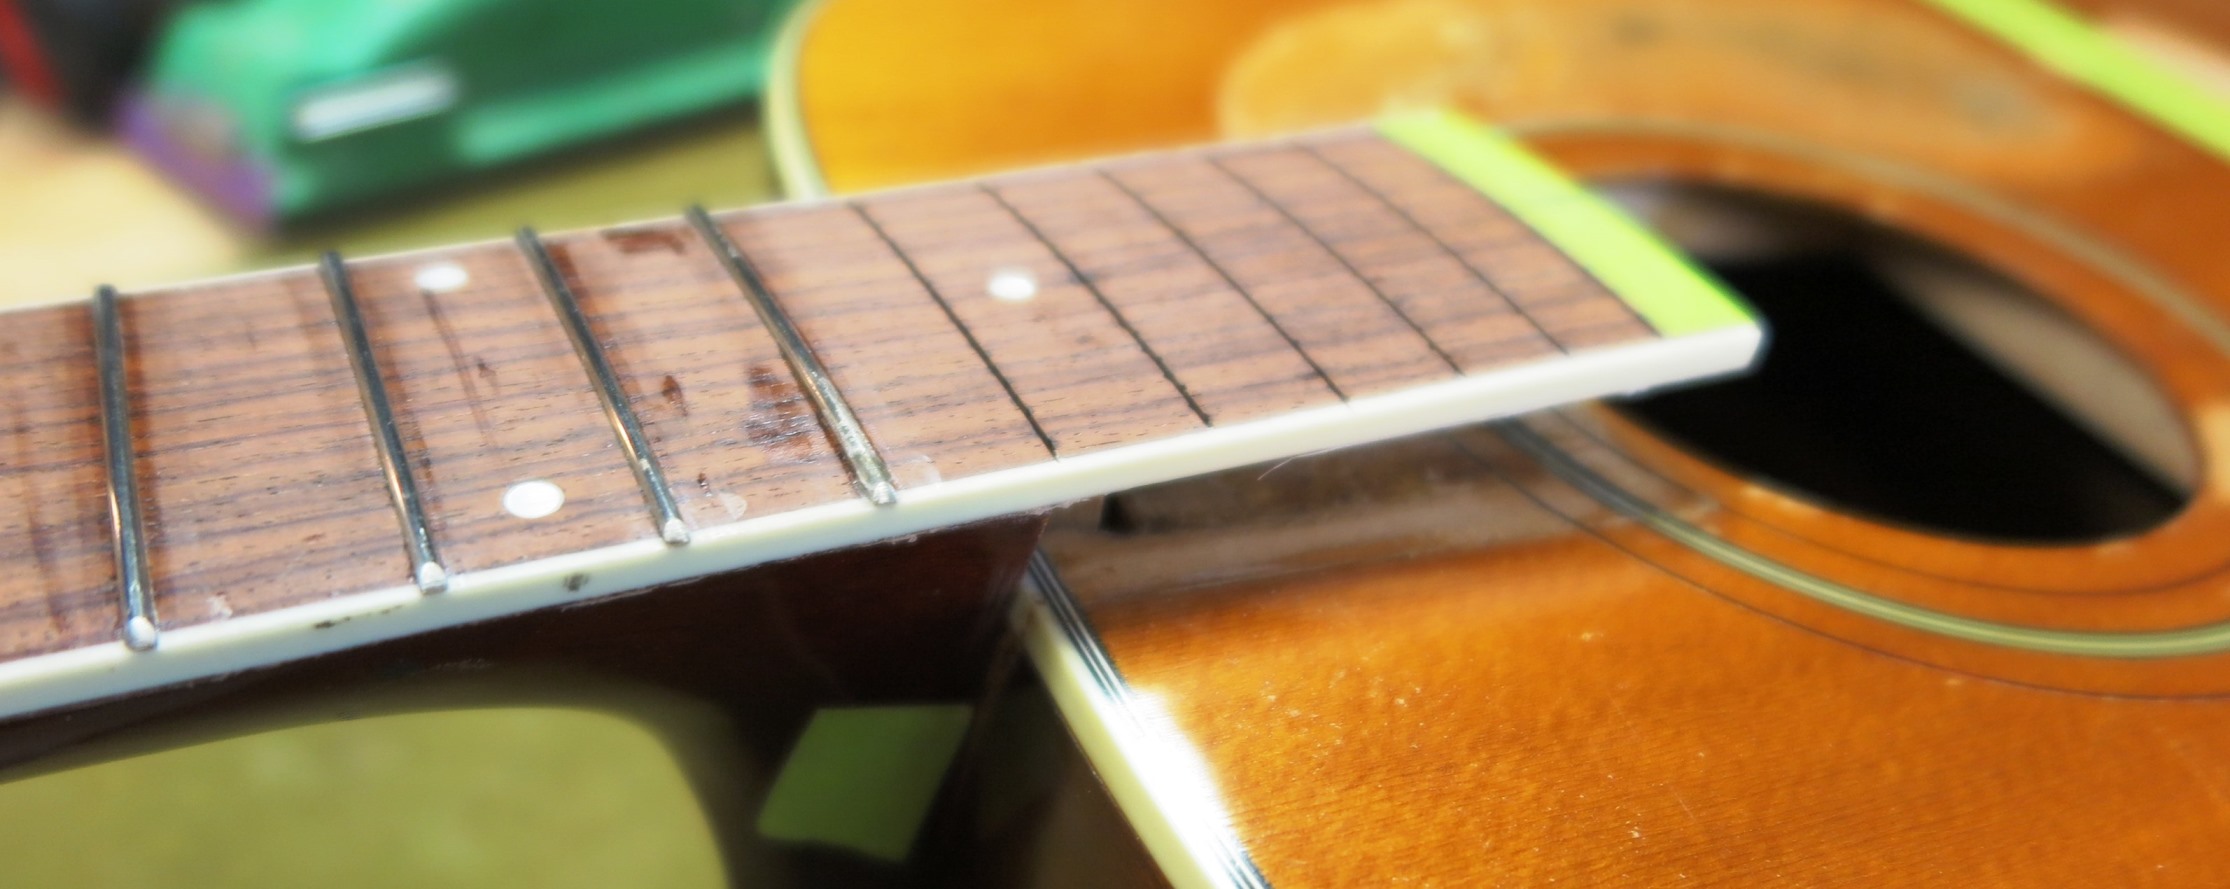
Remove the neck. Note the chalk showing on the dovetail cheeks. In this image the top shims are finished. Work is proceeding on the bottom half glue face shims.
Use a flat stick with sandpaper attached (120 grit) to sand just the area indicated by the chalk dust. Repeat until the dovetail slides tightly into the neck block. Check for neck movement. With careful sanding, the foregoing procedure should result in accurately mating dovetail glue surfaces. At the very least, you should achieve the best glue job possible given the tiny size of the glue surfaces.
A DEVICE TO ASSIST ADJUSTING THE NECK SHOUDLER
The following describes a new technique aiding neck to body alignment and checking during alignment work. One problem encountered during neck to body alignment is testing or checking the string alignment and action alignment while attempting to hold the neck tightly to the body. As wood is removed from the neck shoulder, the joint becomes loose and floppy and hard to hold against the upper bout at the same time holding a straight edge.
This method helps assure a neat and accurate mating between the neck shoulder and the upper bout.
Use a brass threaded insert and 10 X 24 brass bolt with brass washer to pull the shoulder tight to the upper bout surface. This is done before any adjusting or shimming of the dovetail glue surfaces. The procedure is to measure and adjust the neck shoulder surfaces paying close attention to the "A" and "B" surfaces. Perform a partial or preliminary adjustment as needed. Then test fitment by installing the now somewhat loose neck onto the body and tighten the bolt. This provides a very dependable way to verify fret board alignment and play action height. No need to struggle holding the neck tightly to the upper bout to verify alignment. The bolt does it for you. You can check both alignment measurements easily. And you can gradually correct action alignment by loosening the bolt, sanding the "B" areas using the pulled sandpaper strip method, tightening the bolt and checking action alignment again.
Package of brass inserts shown below along with the matching bold and washer.
It seems to me this method is far superior to any attempt to calculate an exact amount of wood to remove from areas "A" or "B". Since upper bout construction is often imprecise, any calculation must yield imperfect results. On the other hand, using the insert and bolt method to gradually adjust the "B" areas will result in a very neat mating of both "B" areas such that the .01 feeler gauge will not slide between either "B" area and the upper bout surface once the desired action alignment is achieved.
Threaded inserts and bolts are not commonly associated with dovetail neck joints. However, another benefit of installing a threaded insert and bolt is strengthening the entire joint where softwood was used for the neck or neck block or both. For example, Harmony Company always used poplar for neck blocks. This wood is not sufficiently strong to hold a dovetail even if the joint was well designed and accurately machined, which it never was. Even perfectly crafted shims cannot always correct for poor quality wood. This problem is very common on cheaper guitars such as Kay and Regal and many other potentially very nice vintage guitars. Aside from making the alignment process easier, the insert and bolt solves a lot of neck attachment strength issues.
Image of threaded insert and bolt purchased from the Micro Fasteners Company Easton, PA. 18042.

INSTALLING THE THREADED INSERT
The diagram below shows a side view of the threaded insert and bolt:
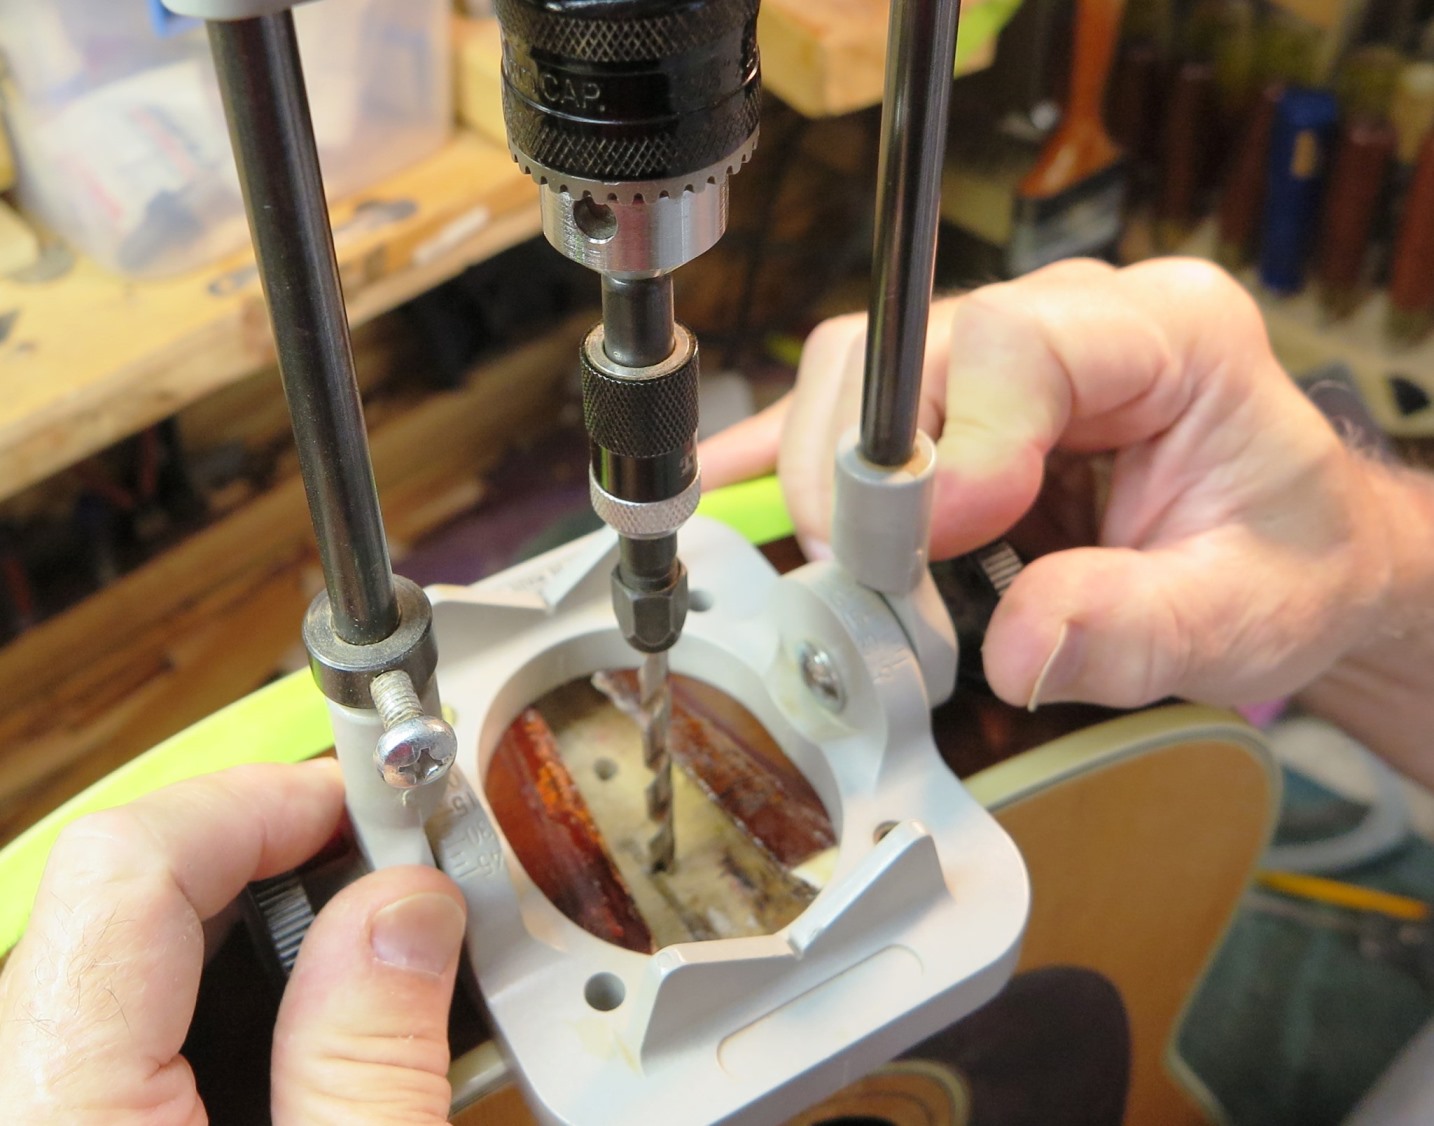
The images below show the tool set required for accurately drilling the hole for a threaded insert.
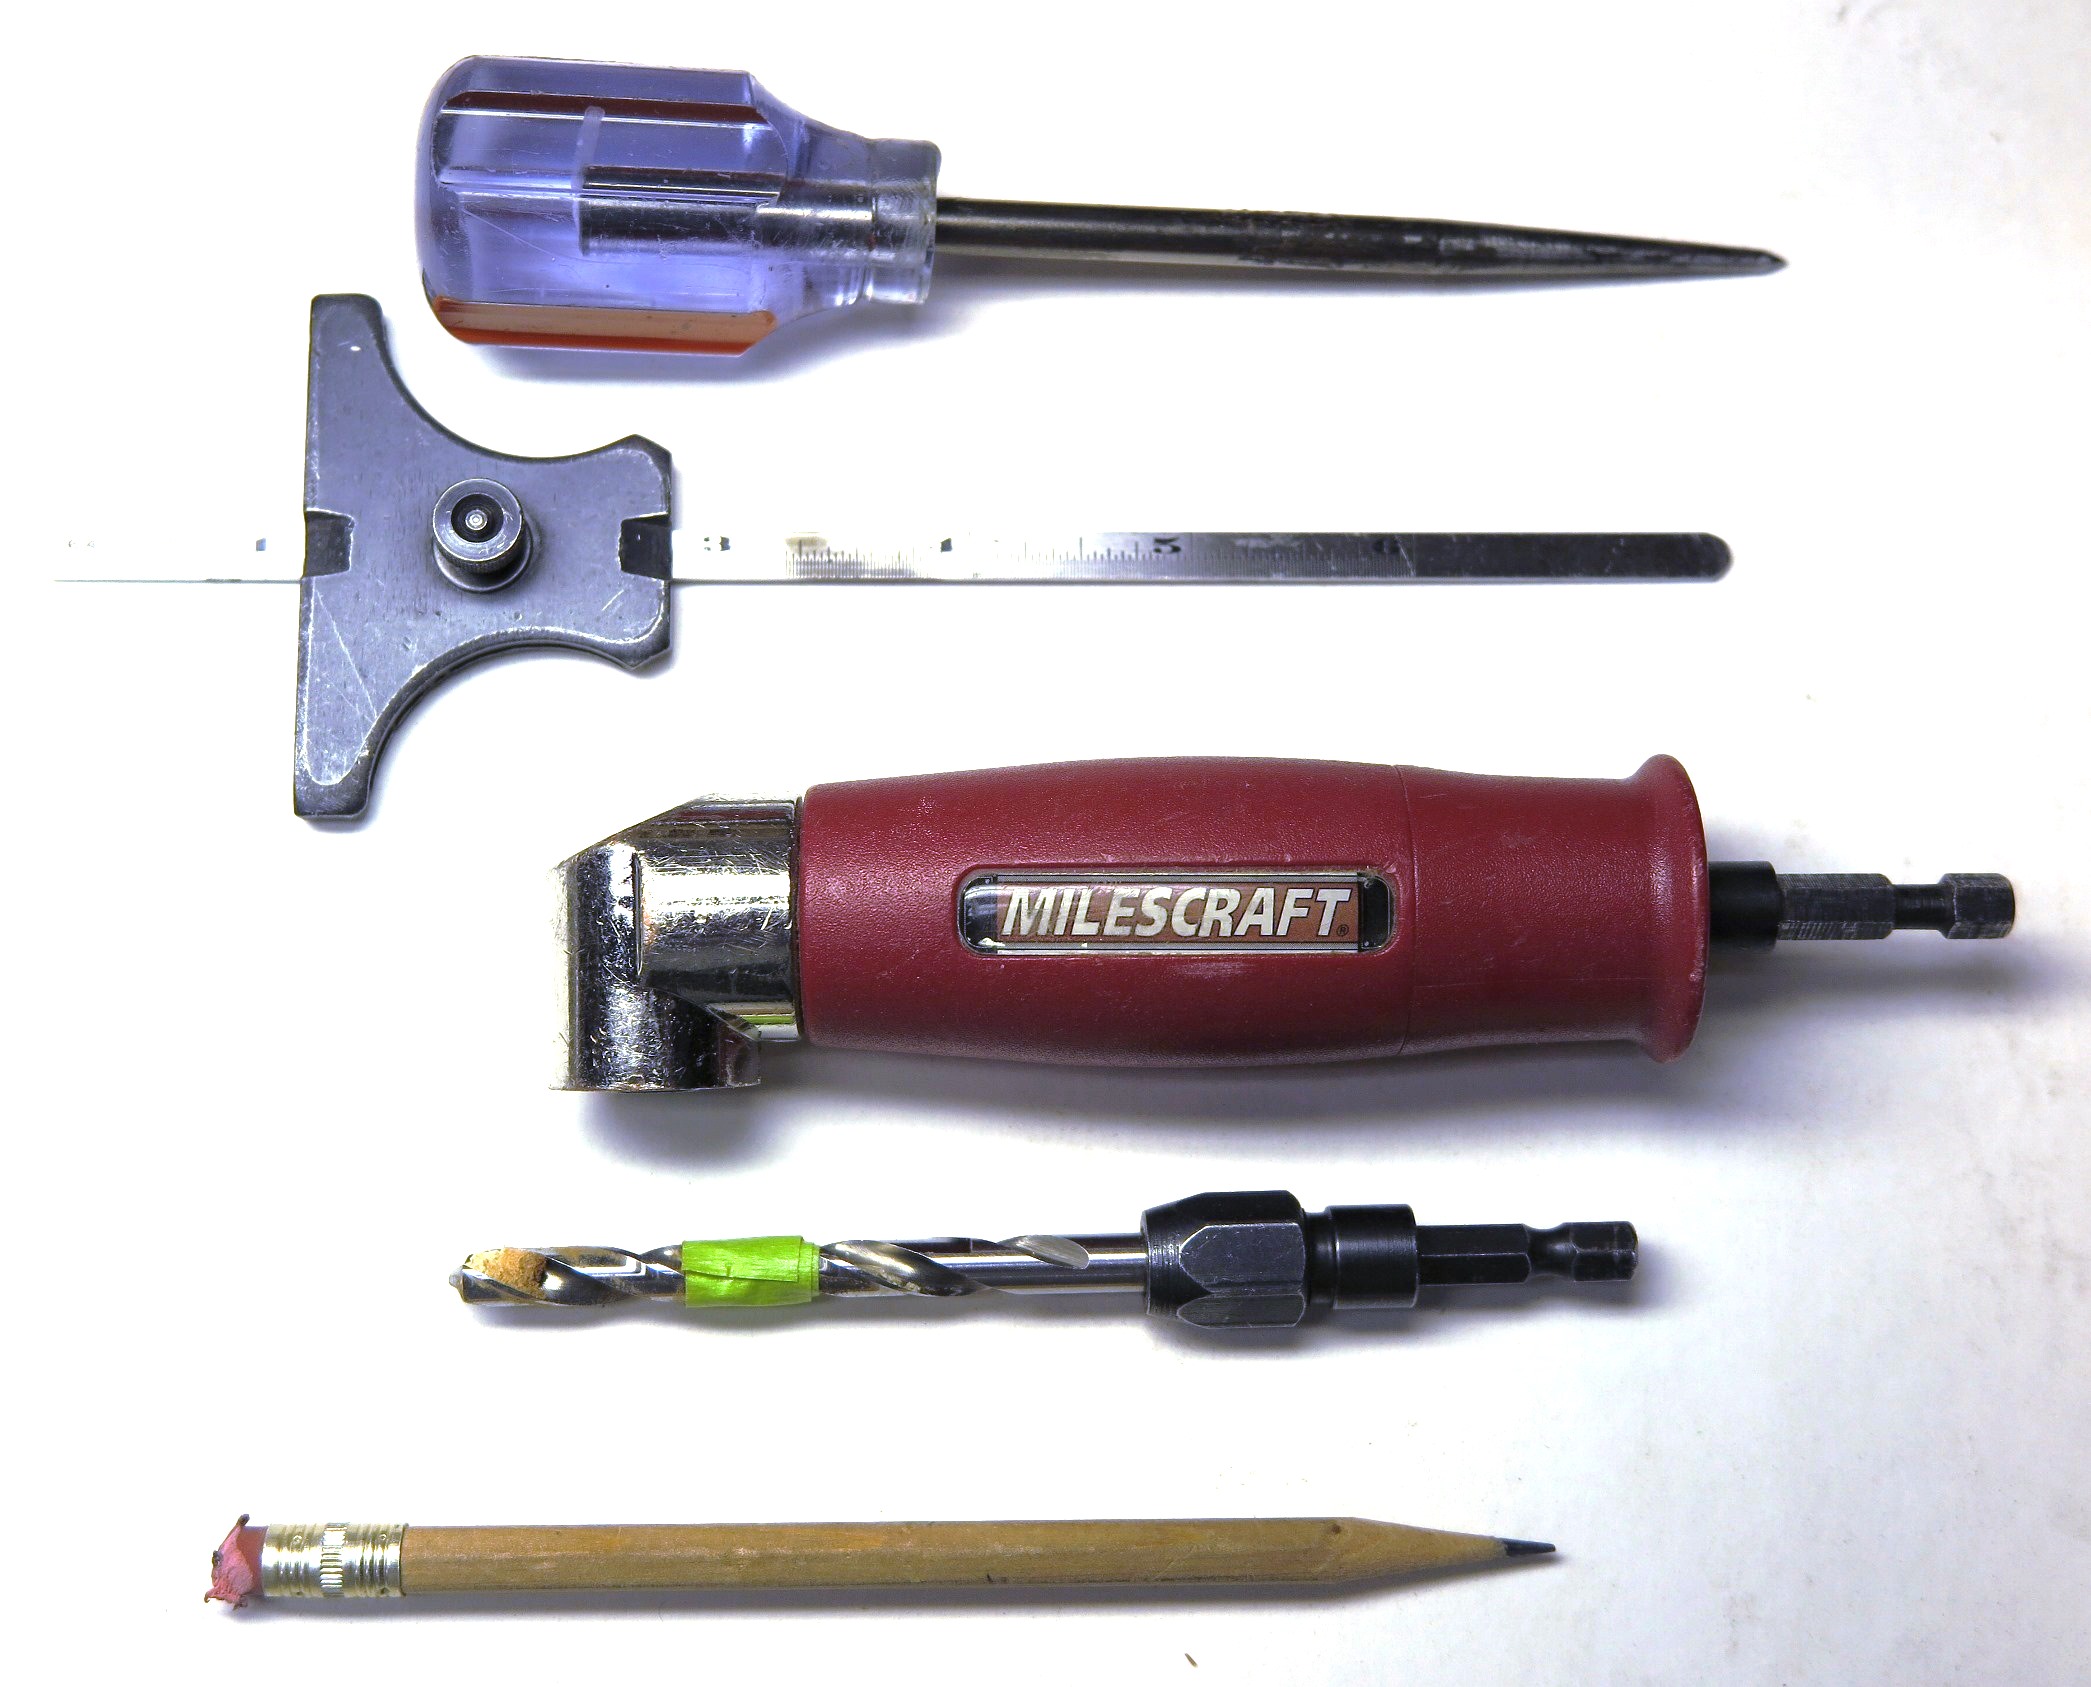
Tools required to drill the insert hole
Steps are as follows:
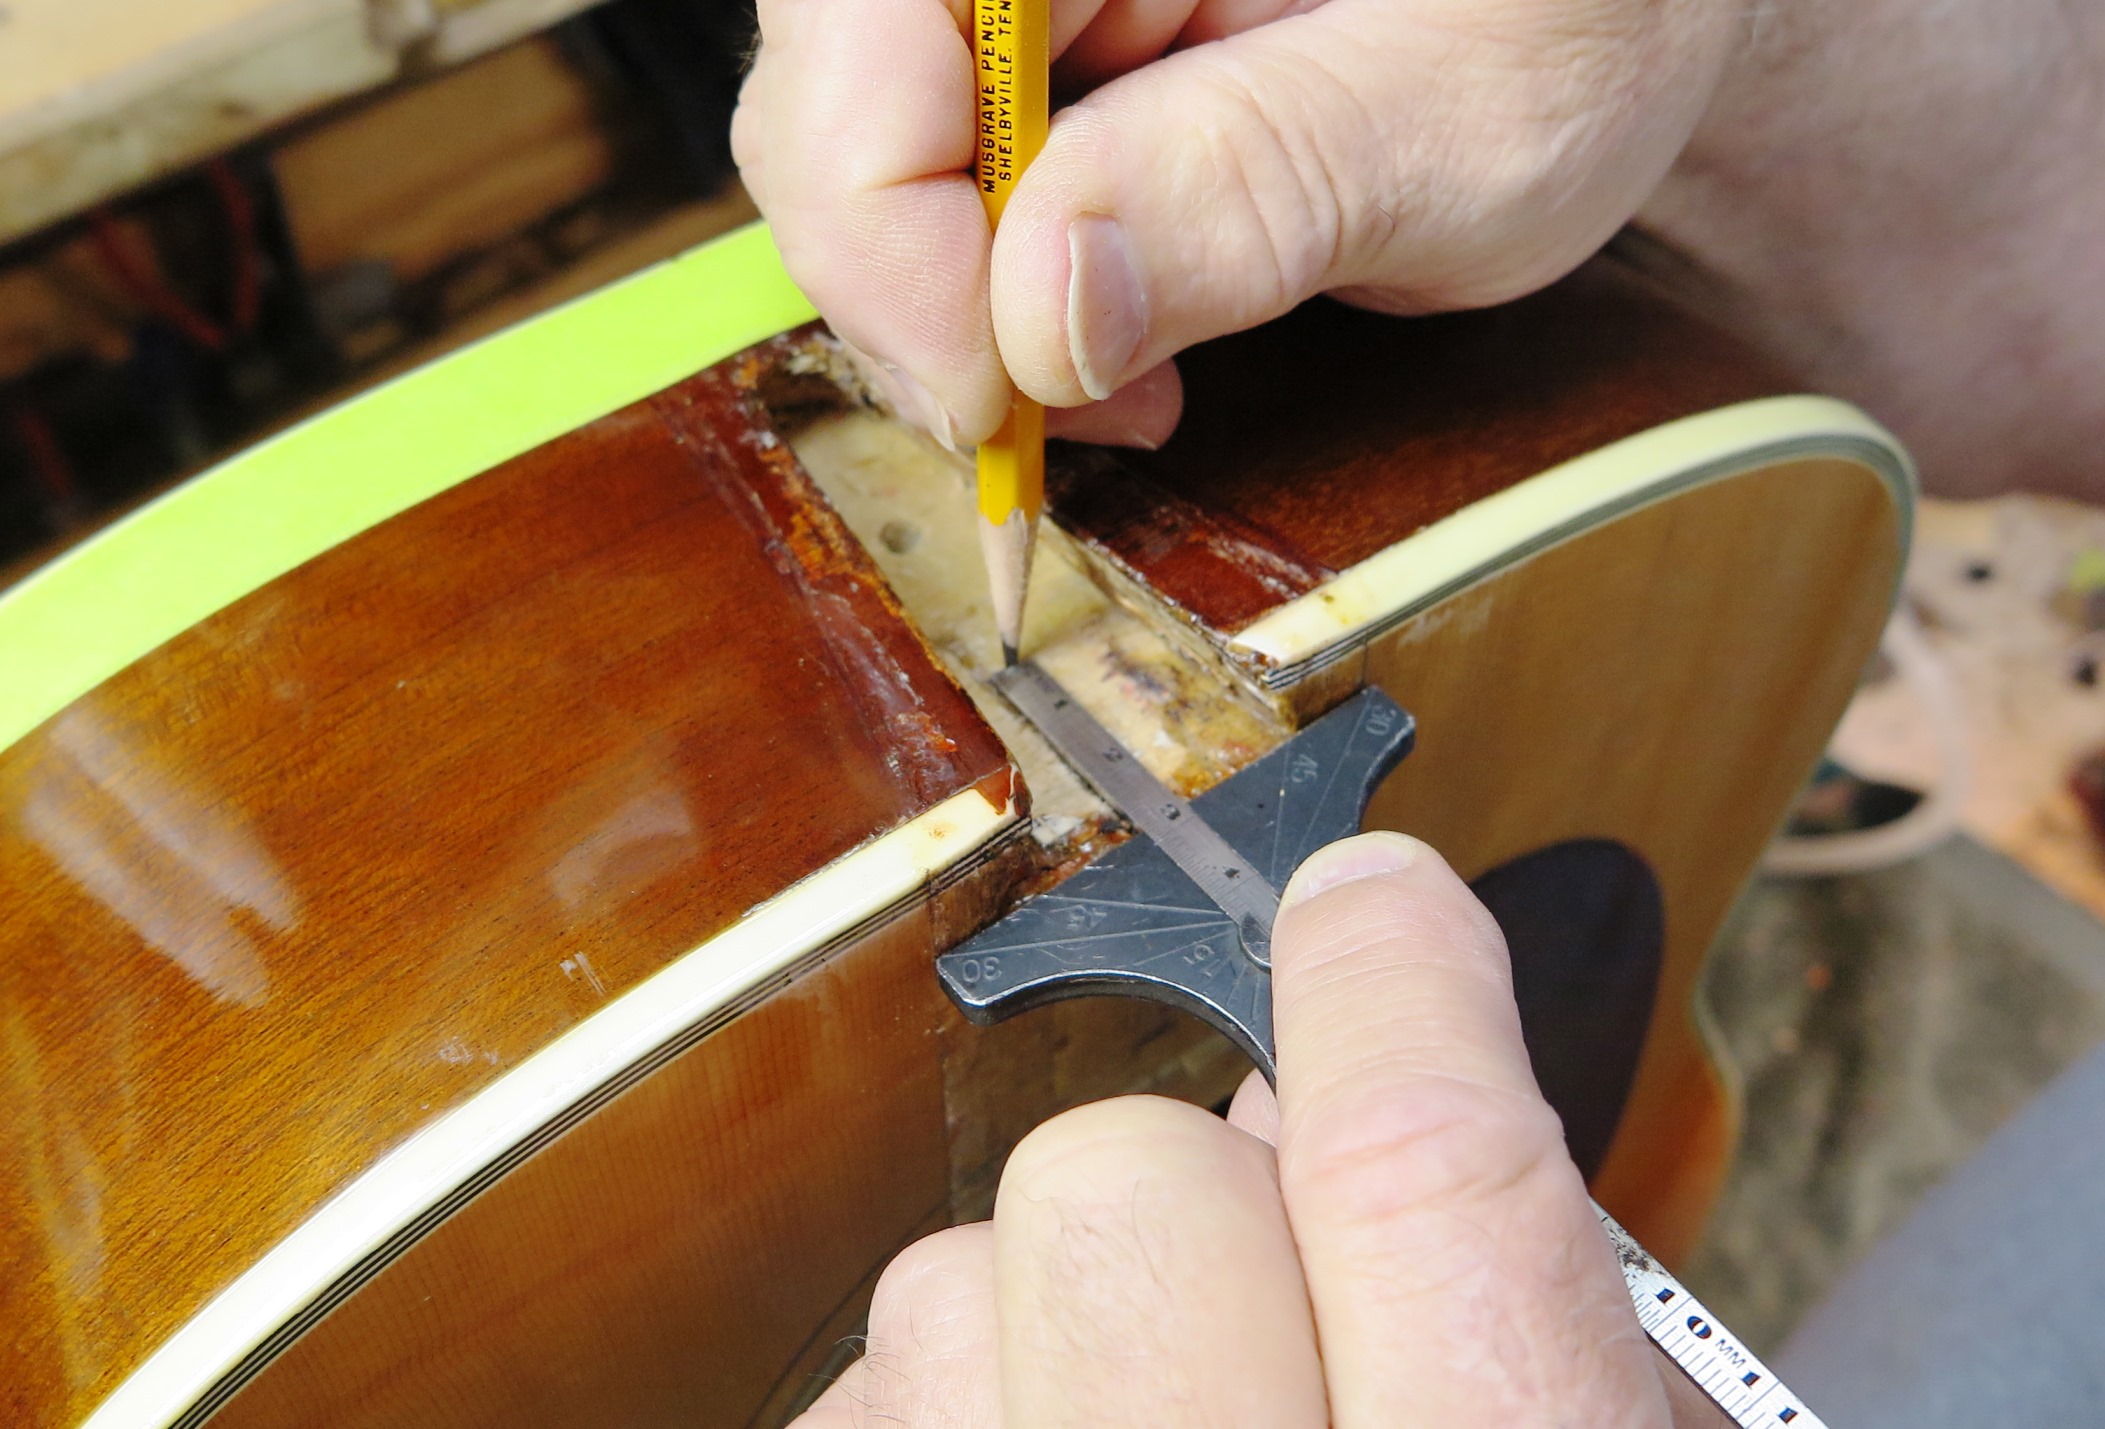
- Measure an appropriate hole location for the insert on the neck heel. There should be plenty of wood for inserting the threaded insert and to avoid splitting the heel. Do not install an insert anywhere near the narrow part of the neck heel. That way lies madness.
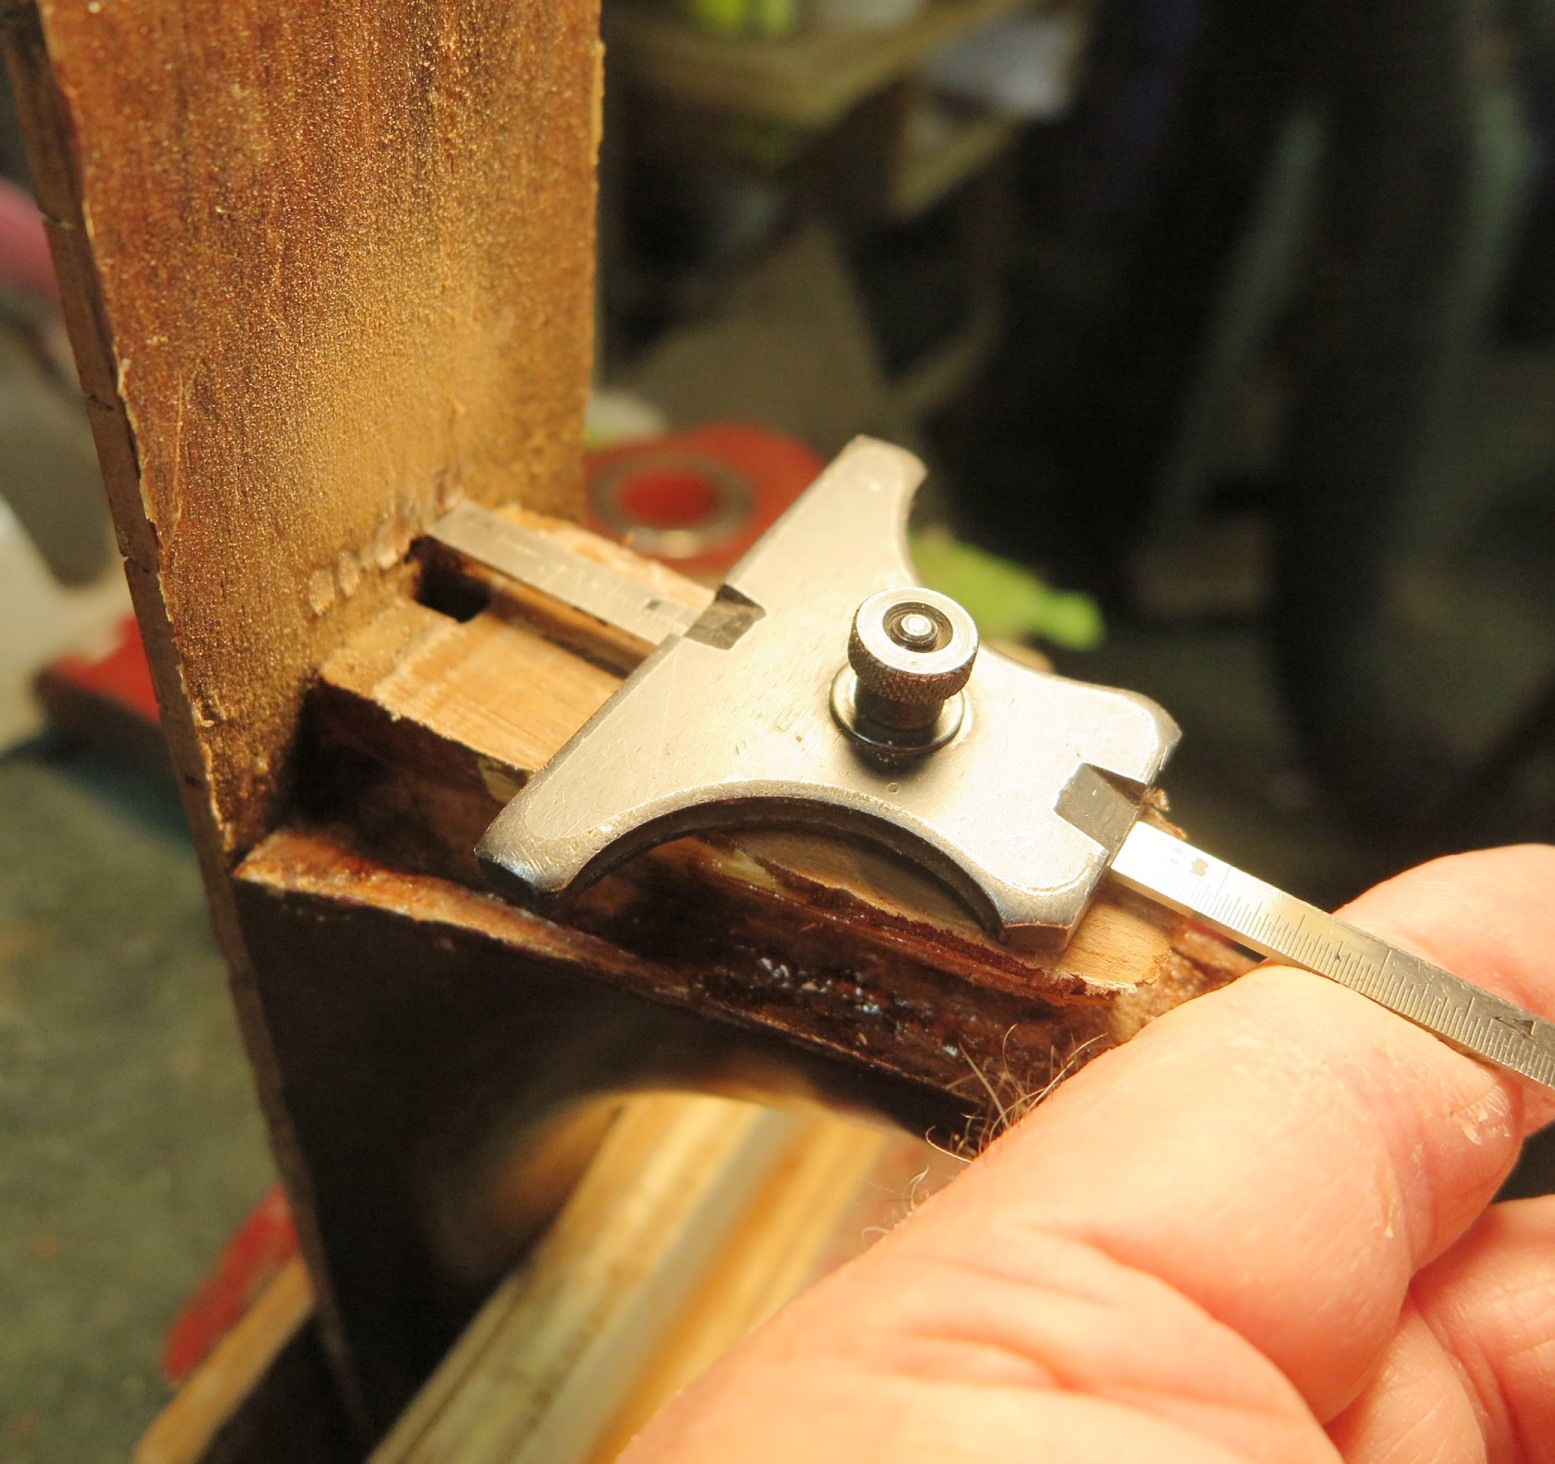
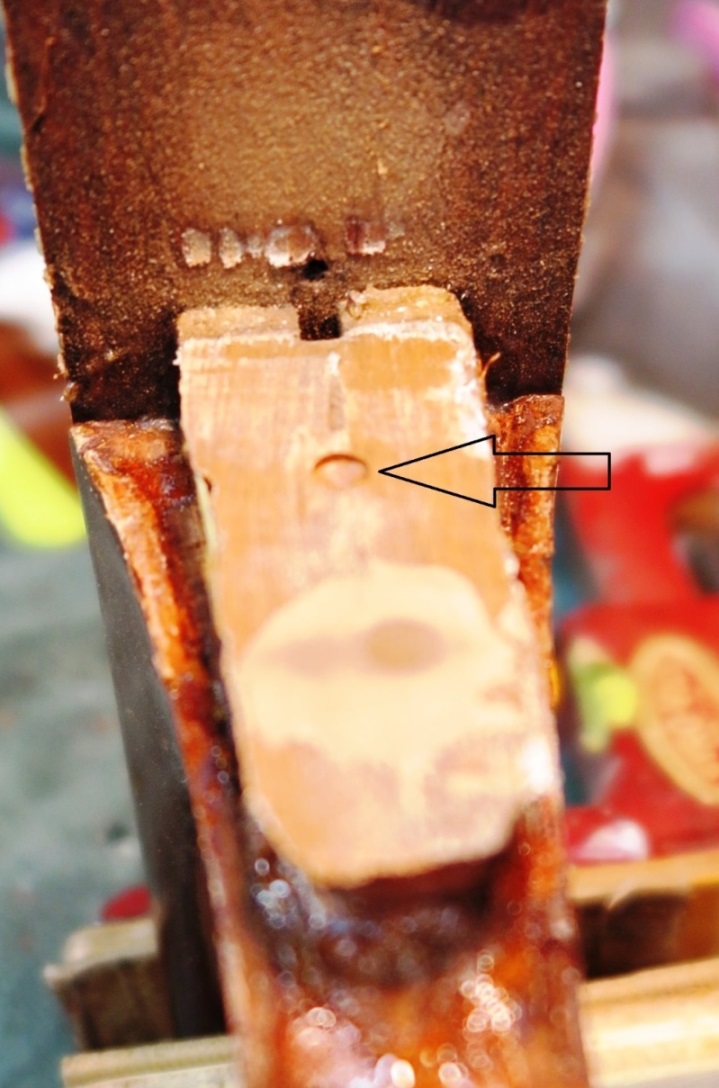
- Transfer the measurement to the dovetail socket side of the neck block. Center the pencil mark on the dovetail socket face. The transfer operation shown below ensures that the hole is at the correct distance below the fret board underside.
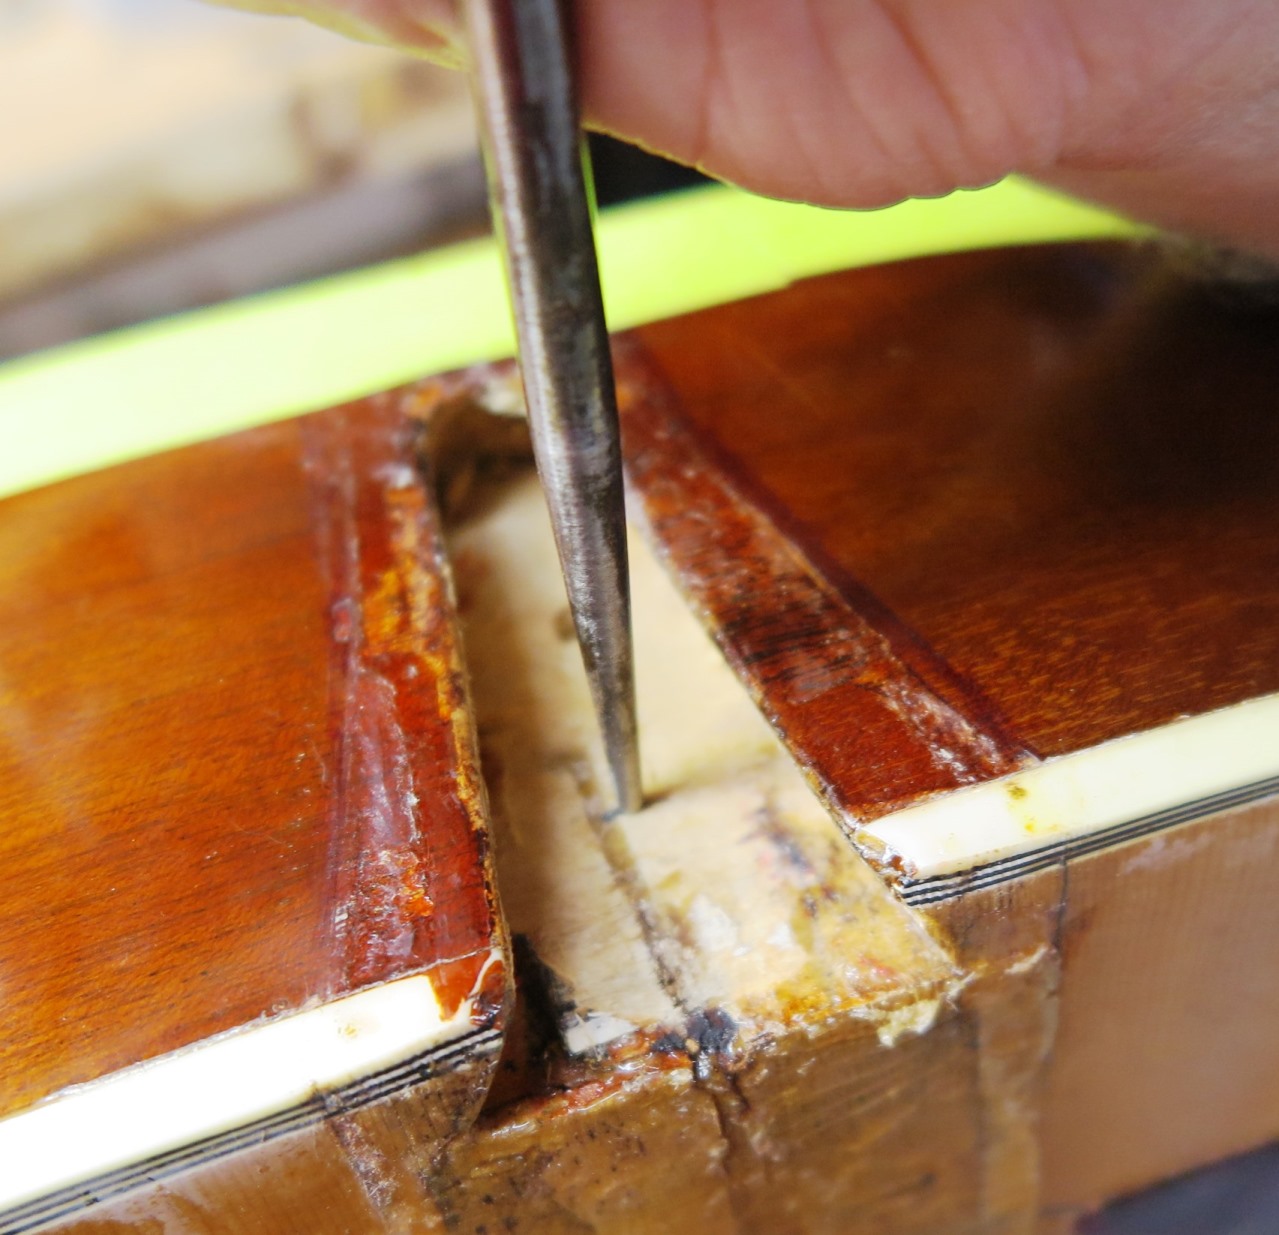
- Punch a starter dimple in the neck block
- Drill a 1/4 inch hole perpendicular to the neck block.
- Clamp the neck to the guitar body
- Use the 1/4 inch bit to mark or dimple (not drill) the neck heel
- Use a 1/4 inch bit to drill the basic insert hole. Make it a perfectly perpendicular to the dovetail end as you can.
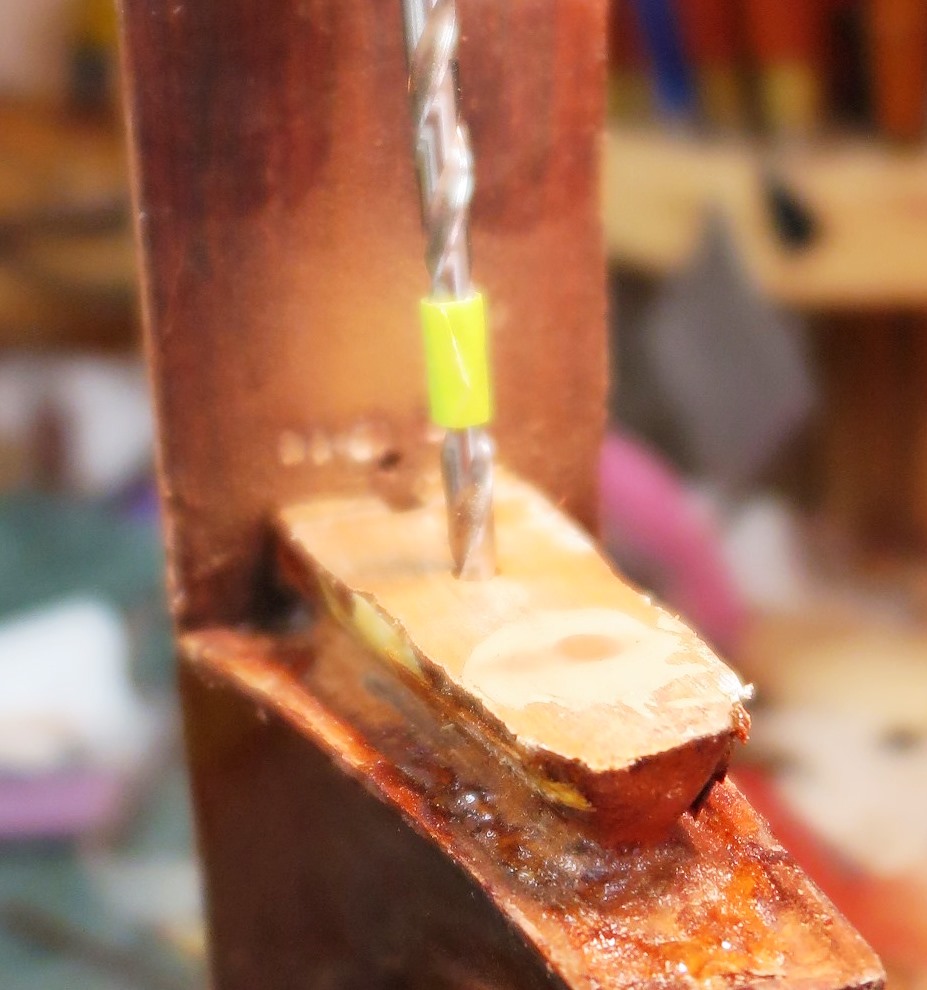
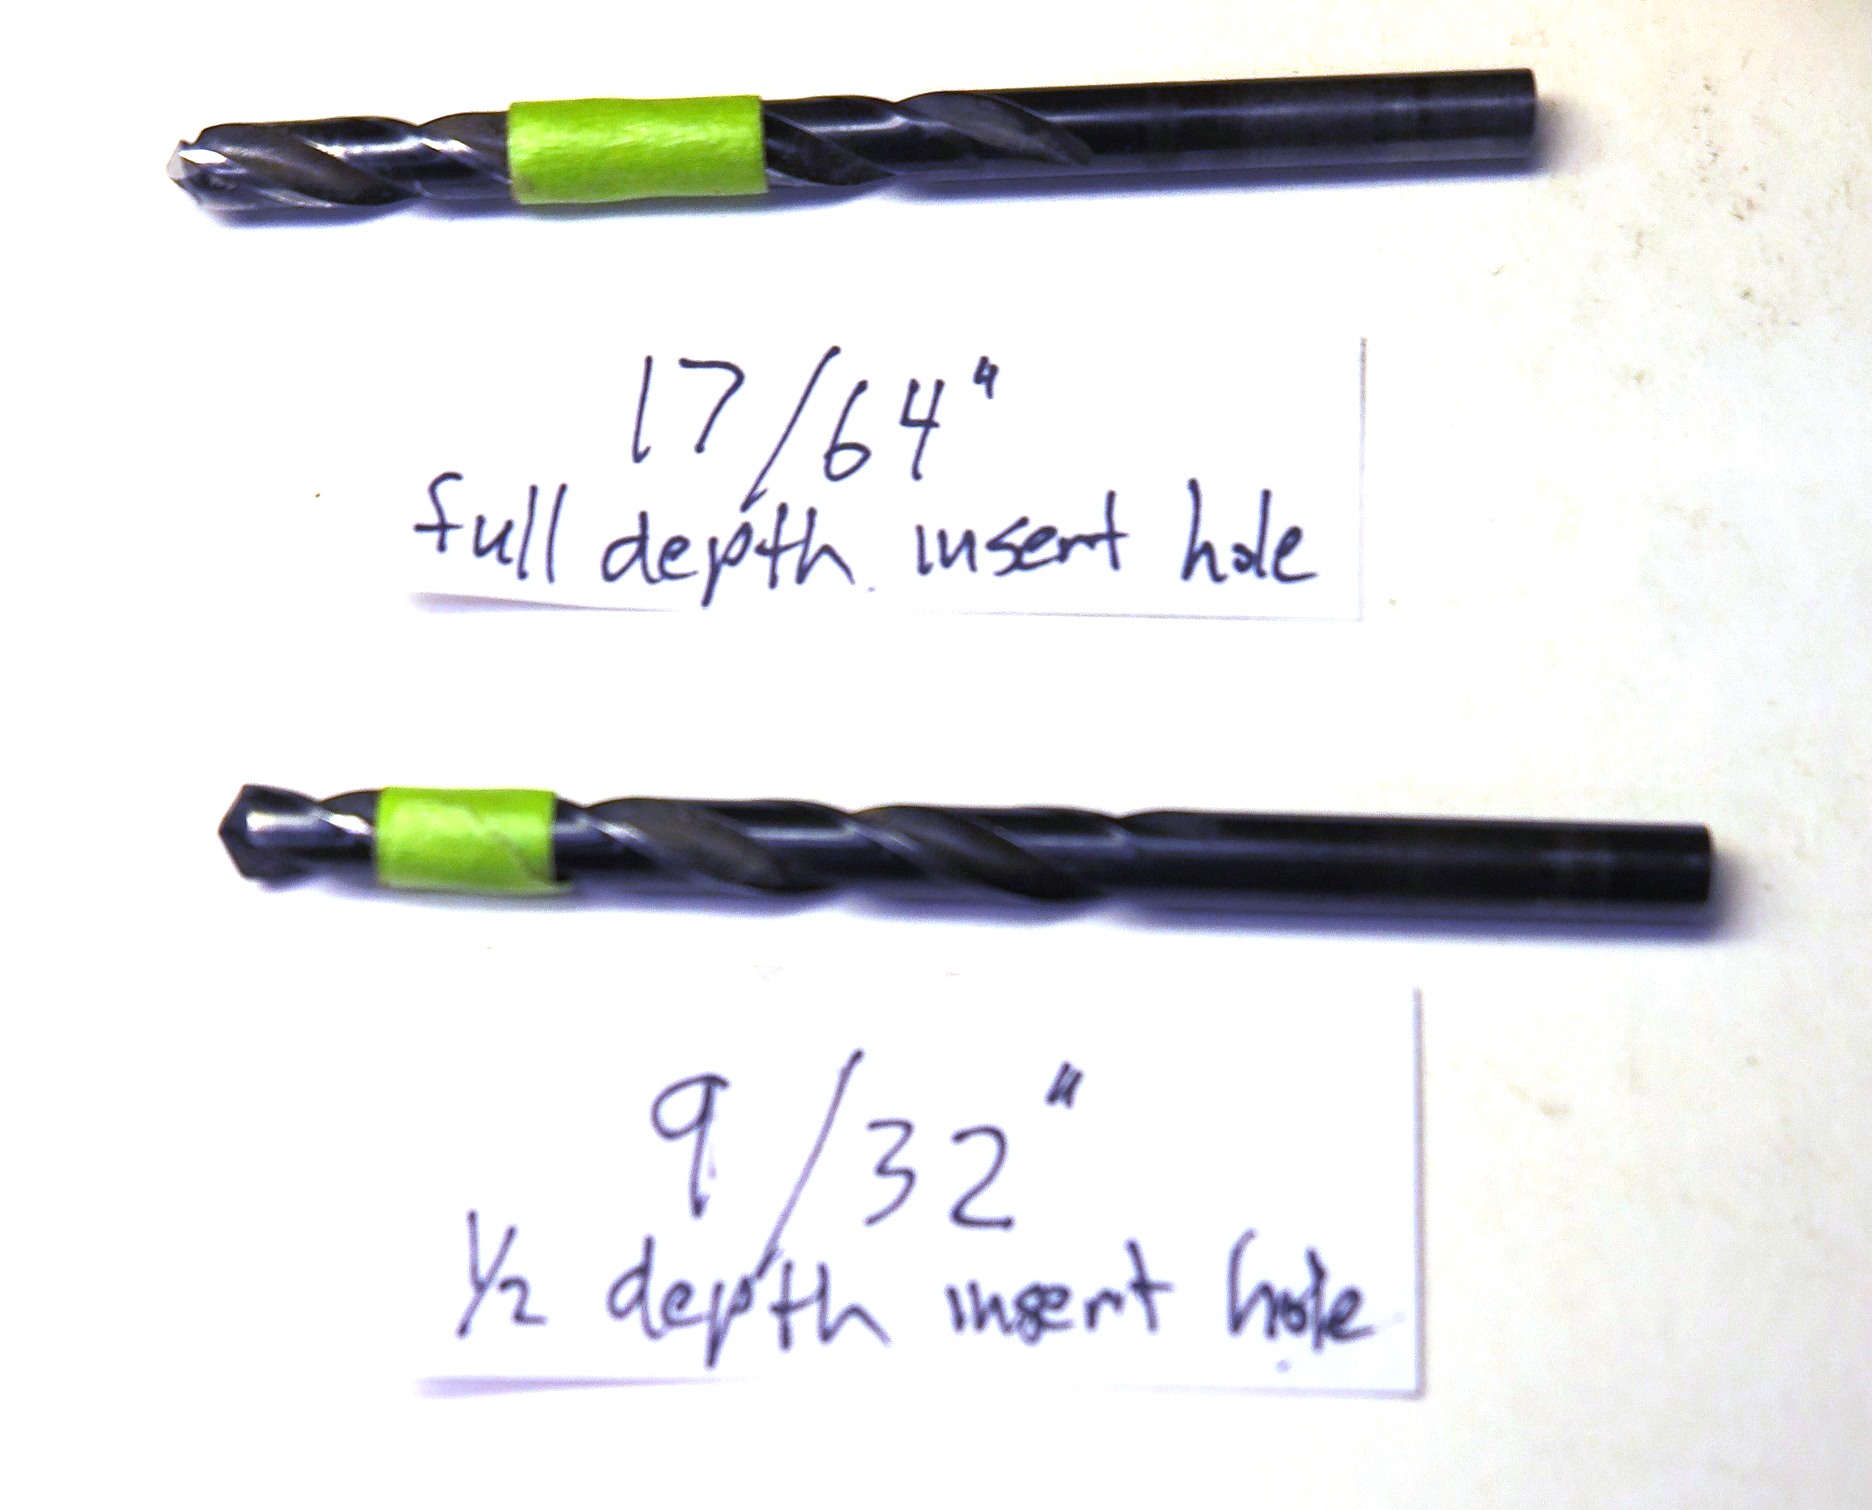
- Enlarge the 1/4 insert hole to a hole diameter appropriate for the insert threads. (Not too tight!) The 17/64 inch bit drills the correct hole diameter for the MICRO Fasteners threaded insert. The 9/32 inch bit drills a shallower hole for easing insertion of the threaded insert into the dovetail. Please note the green tape locations. You should measure all hole depths with the depth gauge shown above.
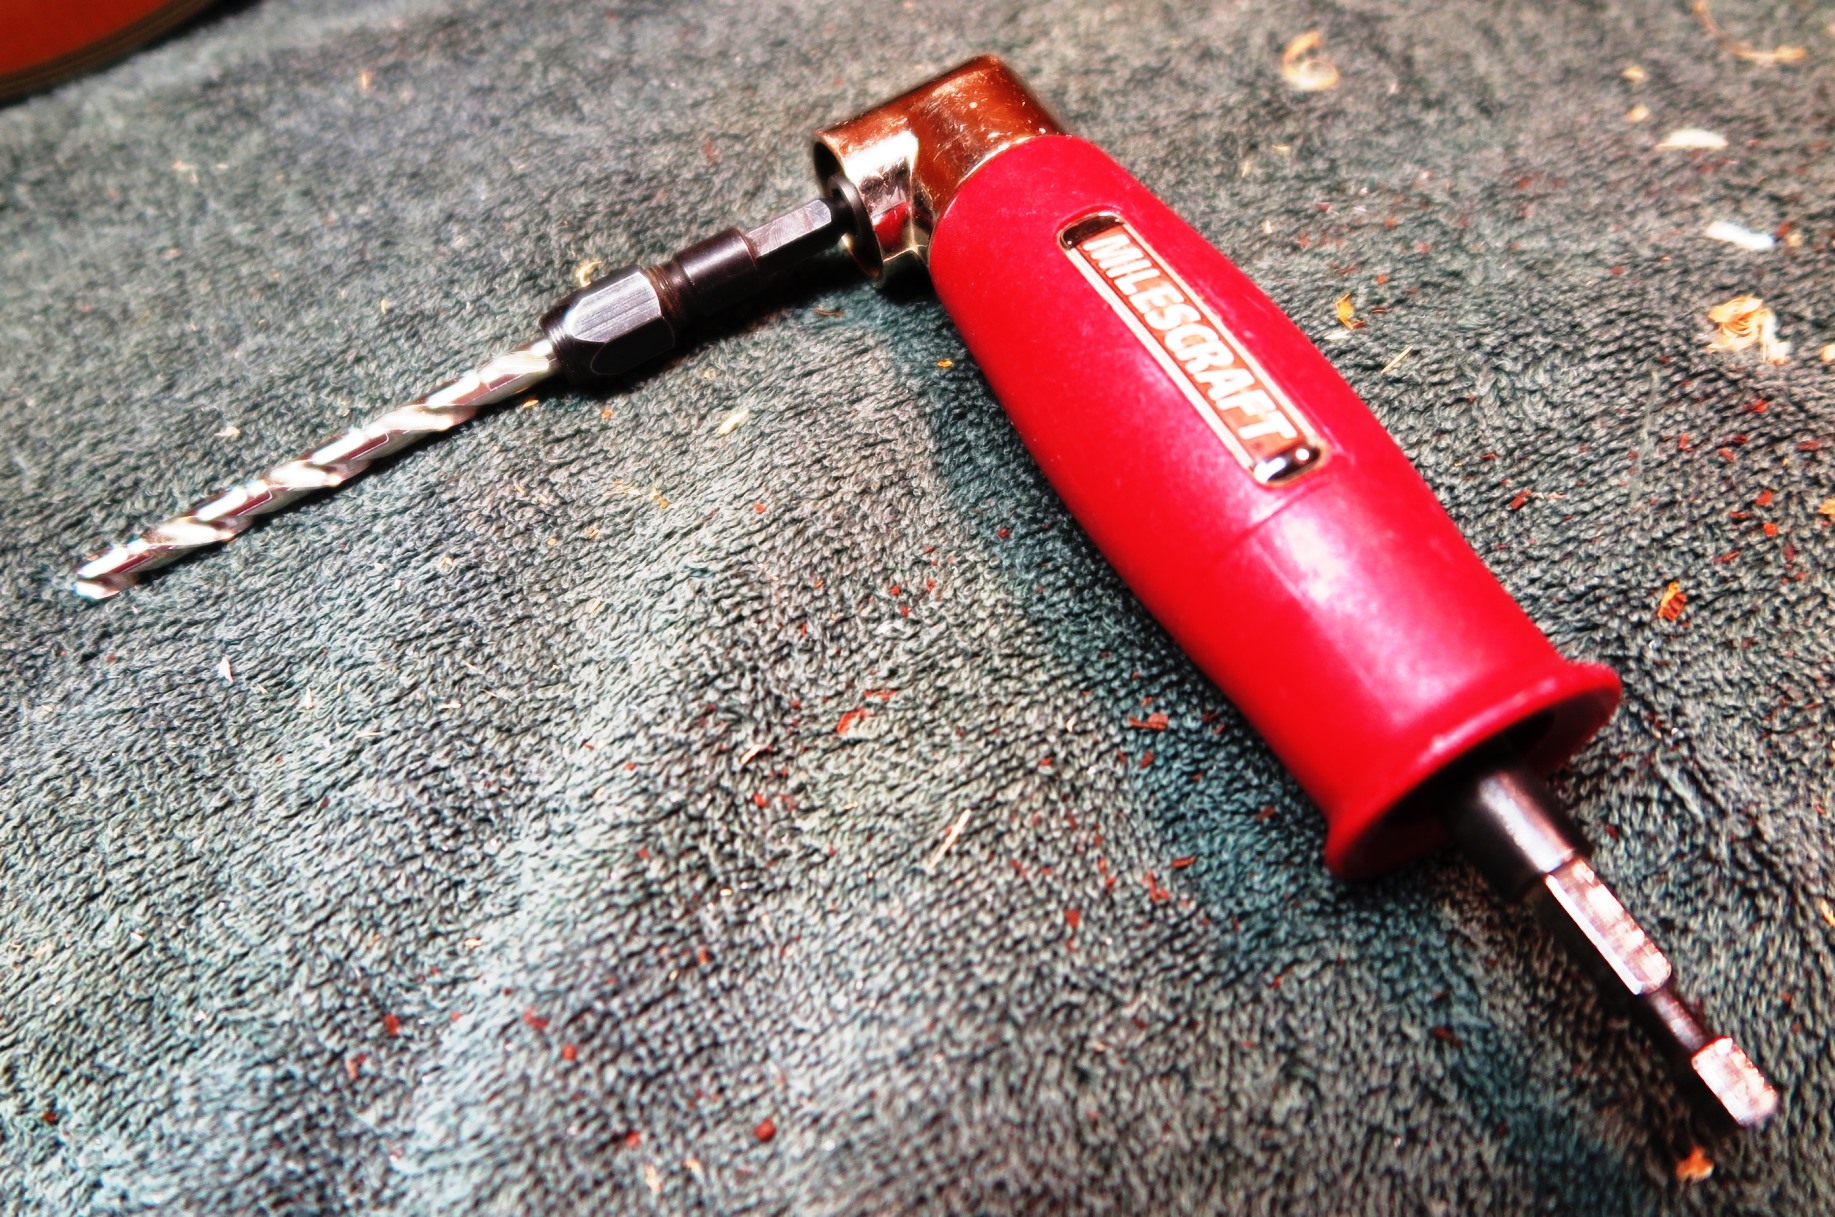
- Install the insert. Two insert driver tools are shown here.
- The screw driver is ground to exactly fit the width of the threaded insert. If care is taken, and the correct dimension holes are drilled, it is possible to use the screw driver to drive the insert down all the way into the hole. However, the ring bolt is definitely the safer tool to use. The ring bolt has two nuts jammed together and super glued to the bolt. Then the nuts are ground down to fit the 9/32” hole diameter drilled part way down in to the hole.
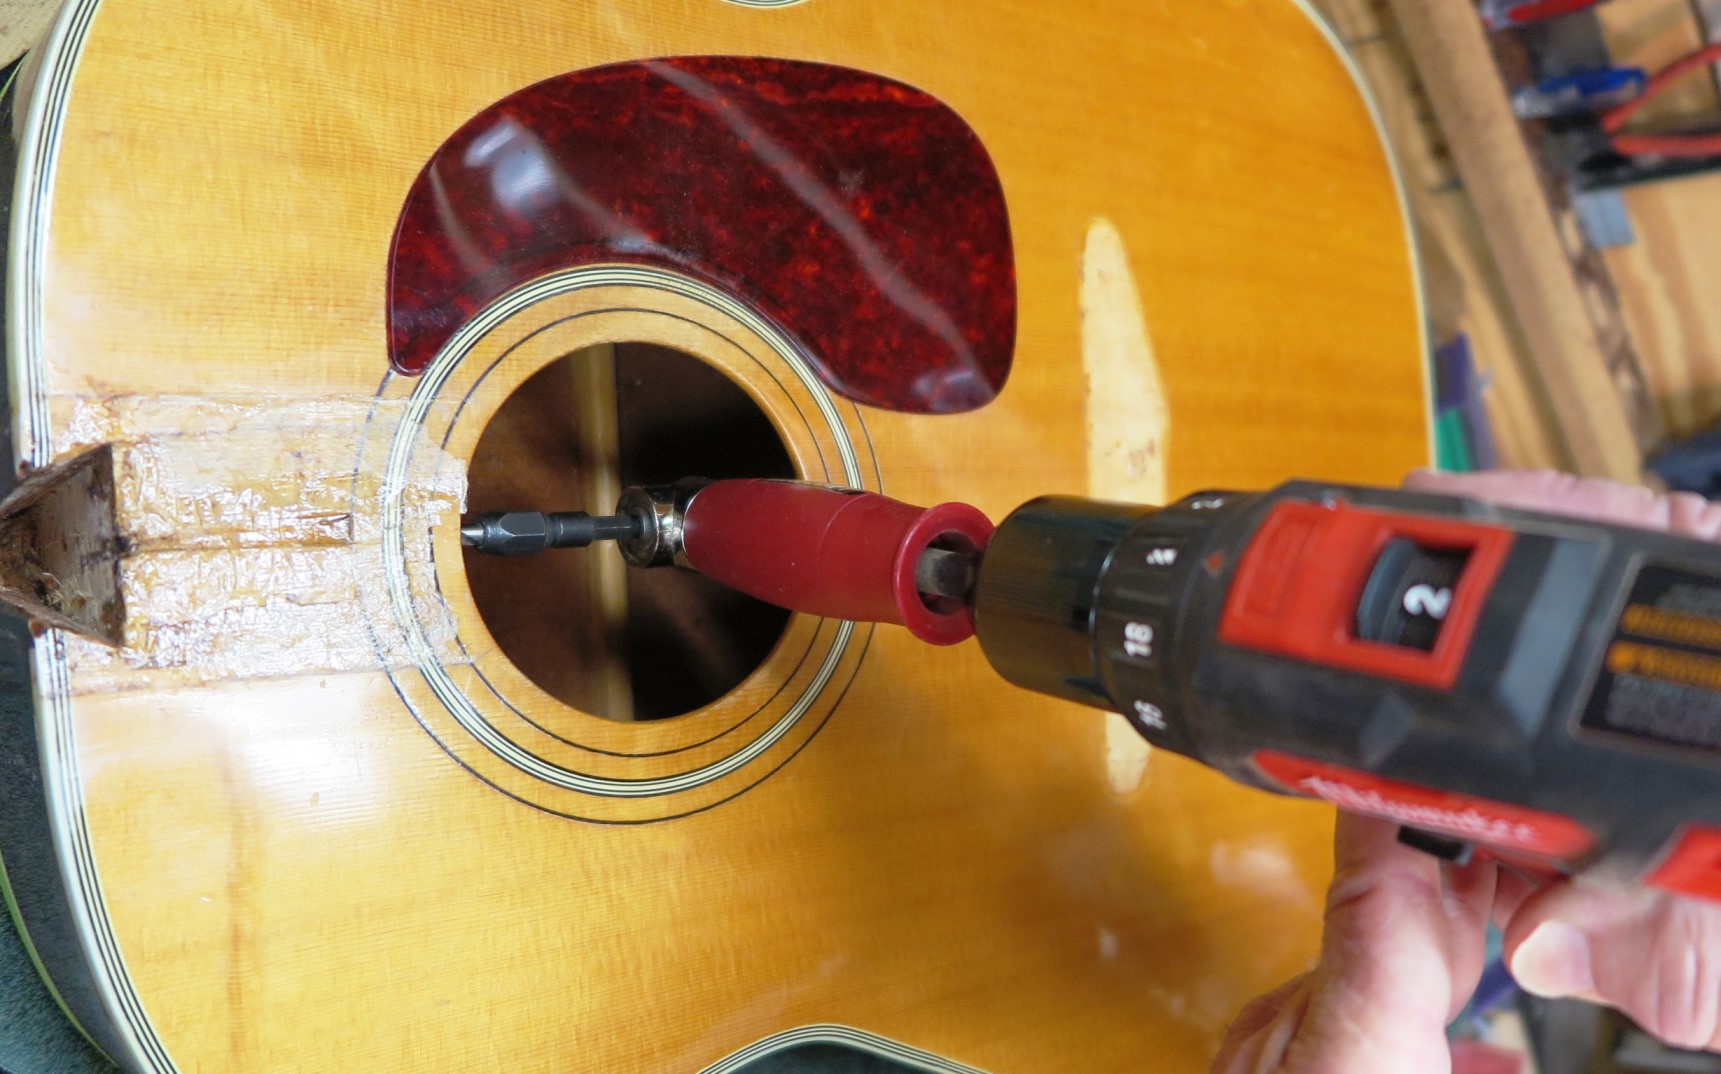
- Increase the hole in the neck block (Not the neck heel) to 19/64.
- Install the neck, insert the bolt and tighten as needed.
- With the neck held tightly against the body, alignment checking is easy.
- You will find that correct set up requires sanding area "B" checking alignment, then loosening (to strip sand) or removing (to chisel or sand the shoulders) then reinstalling several times until perfect alignment is achieved.