Harmony Pick Guard Restoration
Many Sovereign pick guards are badly cupped or warped due to the adhesive they used. They may also be scratched. Fortunately, 40-50 years later the adhesive has failed in most cases. This makes the pick guard easy to remove.
The following explains how to flatten cupped pick guards and restore the surface.
Original installed Harmony Sovereign pick guards are easy to remove. Without scrapers of any kind, pry up one edge of the guard and just pull it off. In most cases, a fingernail is all you need to get one edge up a little. Be sure not to bend the plastic.
Prepping the guard for restoration
- Make sure all adhesive is removed from the pick guard back. Best tool for this is a Milwaukie Carton type single edge razor blade. Do not use any blade with sharp corners. (This is Model# 48-22-1934 or 54 at Home Depot.) For comfort, put electrician tape on the notched edge.
- Preheat oven to 200 degrees f.
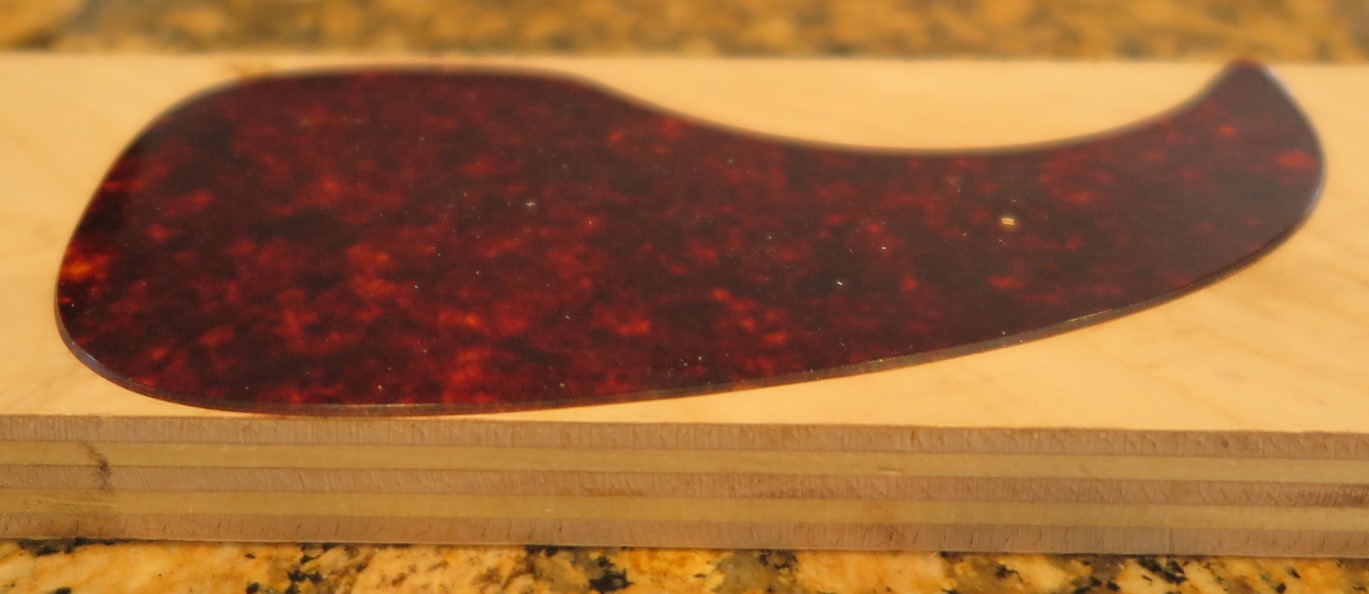
- Put the pick guard between two scraps of 3/4 cabinet grade veneer core plywood. You can not use B-C exterior grade. At least one surface must be very smooth.
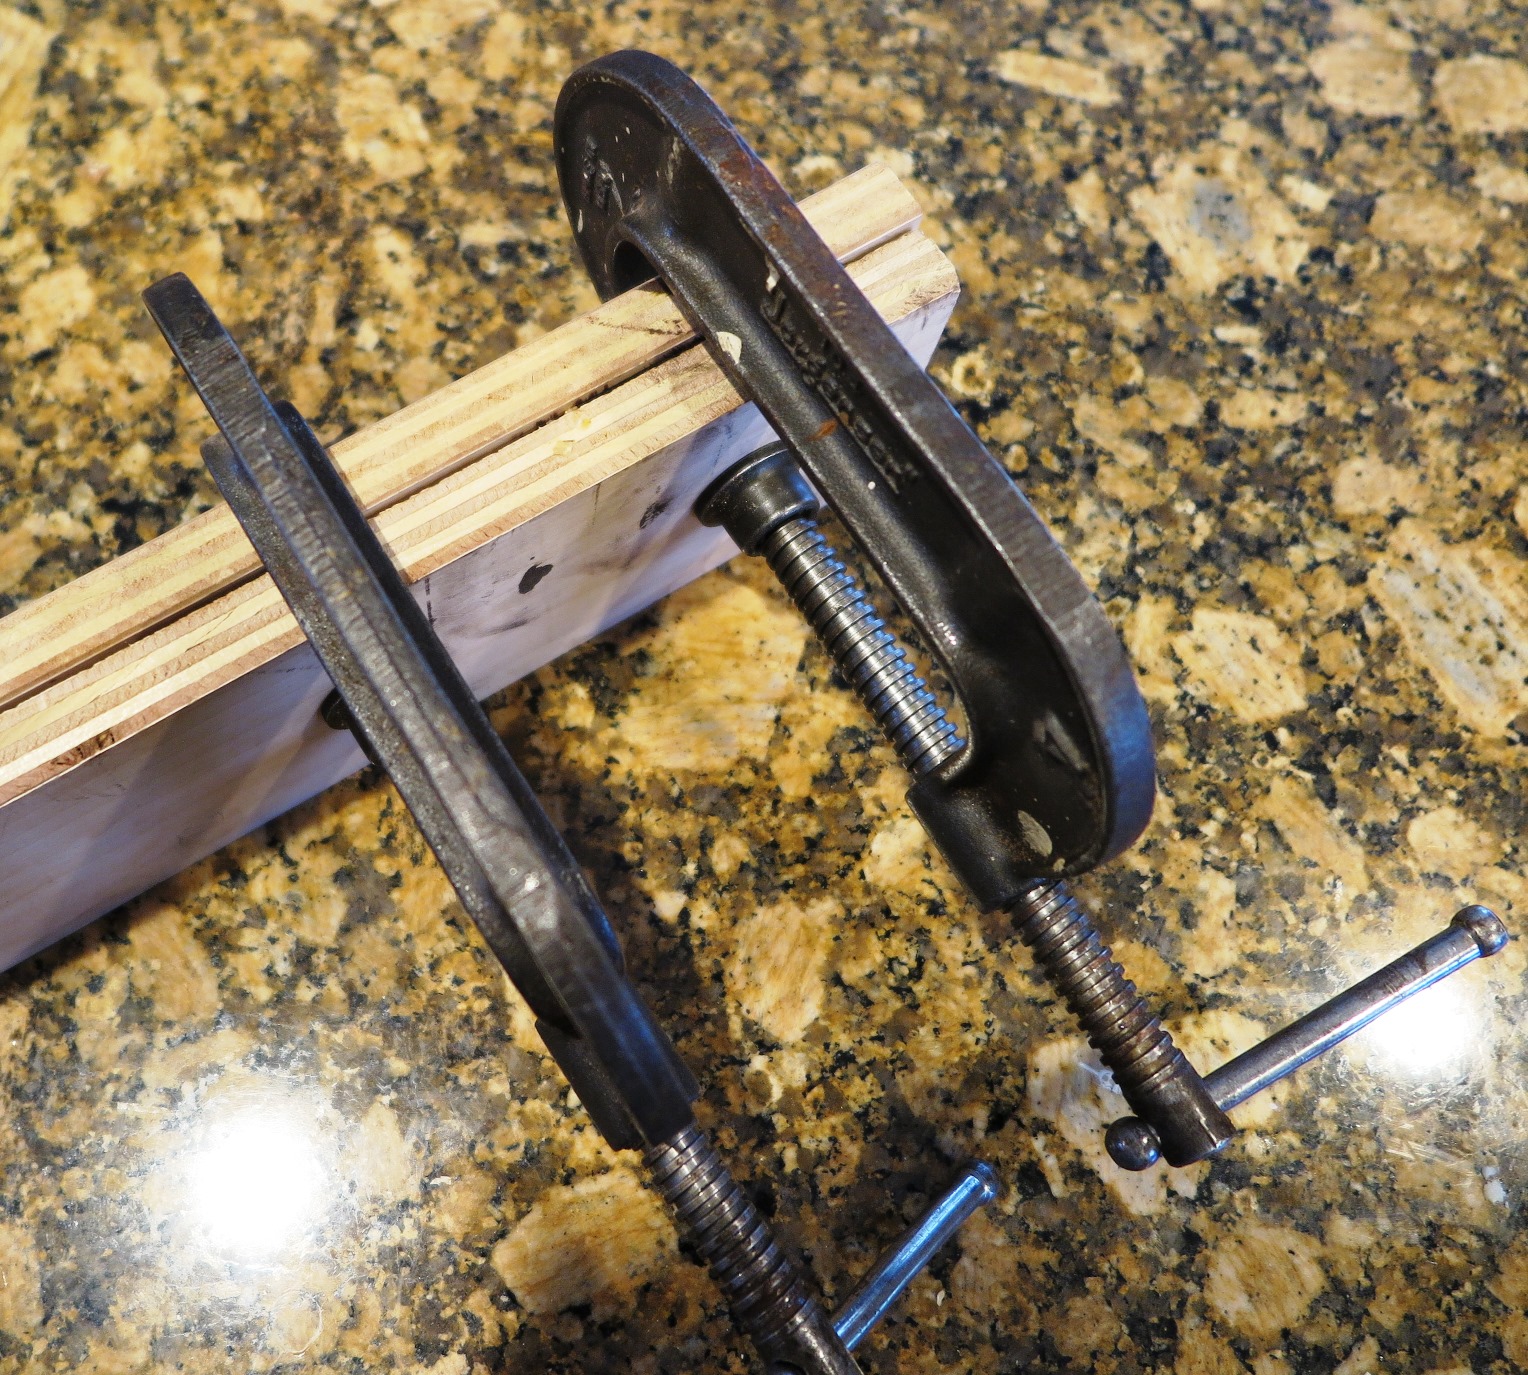
- Use two or more all metal C-clamps to clamp the plywood-guard-plywood sandwich. If you don’t have high capacity clamps as shown below, this won’t work. The clamps shown here are Jorgensen #104 clamps capable of 4000 lbs/square inch pressure. Jorgensen #106 clamps are also good. This procedure takes huge pressure to flatten a warped guard. I mean to say thousands of pounds per square inch.
- Place the plywood pick guard sandwich in the oven with the clamps tightened as much as possible.
- Heat for 30-40 minutes.
- Remove the plywood pick guard sandwich and clamps from the oven. Leave the clamps tight until everything is room temperature.
This heating and clamping results in a perfectly flat pick guard.
However, there may be wood splinter indentations in the shinny side of the guard. Below are steps to restore the surface shine.
- Adhere the pick guard on a flat surface with double stick tape, shinny side up.
- By hand, wet sand entire surface with 400 grit and soapy water until all marks are gone.
- By hand, wet sand entire surface with 600 grit and soapy water
- By hand, wet sand entire surface with 800 grit and soapy water
- By hand, wet sand entire surface with 1000 grit and soapy water
- By hand, wet sand entire surface with 1200 grit and soapy water
- By hand, wet sand entire surface with 1500 grit and soapy water
- By hand, wet sand entire surface with 2000 grit and soapy water
- Remove all sanding residue.
- Wear neoprene gloves.
- Hand buff with coarse Stewmac buffing compound. Remove all compound residue.
- Hand buff with medium Stewmac buffing compound. Remove all compound residue.
- Hand buff with fine Stewmac buffing compound. Remove all compound residue.
- Very gently pull the guard off the flat surface.
- Remove all buffing chemicals and the tape.
- Make sure the guard is clean all over.
At this point, the surface should be 99 % perfect.
Use 3M adhesive film to adhere back onto the guitar top.